
Liquid Sculpey® Splash of Blue Molded Pendant
Liquid Sculpey® Splash of Blue Molded Pendant
Designed by Amy Koranek
Read More
Read Less
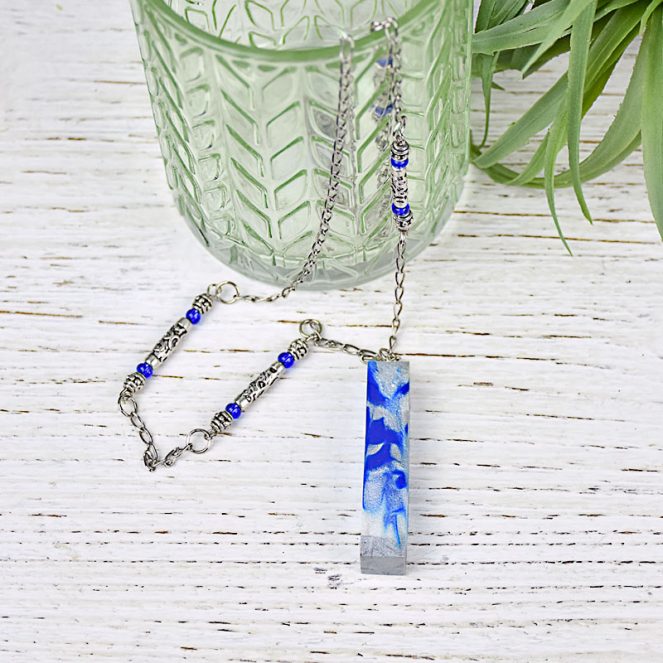
Sculpey Liquid Clays and the Sculpey 3D jewelry mold team up to create a one-of-a-kind pendant! A layered look of soothing colors makes for a calm combination reminiscent of a sea splash.
ADDITIONAL SUPPLIES
• Paper towel
• Cotton swabs
• 91% Isopropyl alcohol
• Sharp scissors or a craft knife
• 2” Silver tone eye pin (5)
• 4mm Silver tone jump rings (9)
• 24” Silver tone chain
• Metal silver tone round spacer beads (8)
• Metal silver tone 3/4” tube beads (4)
• Bright blue E-beads (8)
• Round nose jewelry pliers
• Wire cutters
• Flat nose jewelry pliers
• Optional - Silver tone necklace clasp set
Project Instructions
- Getting Started:
- Baking:
This piece will be made by layering the Liquid Sculpey (LS) colors into the square shaped mold and then marbling the colors with the tip of an Etch ‘n Pearl. The color scheme makes it easy because all three of these colors will look really pretty marbled into each other, so the order that they are layered really doesn’t matter. I first placed a layer of Silver LS, then Pearl LS, then Blue LS in the bottom of the square shape. The mold is slightly clear so you can easily see how much of each color you are placing inside.

Keep layering the colors to the top. That Silver streak you see on the left most side of the mold is where I accidentally dripped Silver LS down the side wall instead of it falling directly into the layers. I did not correct that drip because this project is going to end up marbled. But if you want to clean up drips on the inside of the mold it’s easy to do by dampening a cotton swab with alcohol and very carefully dragging it along the inside walls removing drips on the tip of the swab.

Keep layering the colors almost all the way to the top. Leave at least an 1/8” of open space at the top because we are going to insert a tool into the liquids to marble the colors. The tool will need some empty space and we don’t want the liquids to overflow. Carefully insert the small Etch ‘n Pearl into the center of the liquids and push it all the way to the bottom center of the mold. Then carefully drag the tip to the center of one of the sides and pull it up along the side. You will see the colors marble into each other because of the tool dragging through them.

Repeat this inserting and dragging process on all the sides so that the piece is equally marbled all the way around. When you are done, carefully remove the tool and wipe the excess LS away with paper towel. Then back fill the mold all the way to the top with one of the colors. I topped mine off with Silver LS.

Place one of the eye pins on the rod that comes with the mold. Locate the little raised brackets on the top of the mold that are there to hold the rod in place during baking. Dip the tail of the eye pin all the way down into the LS and position the rod into the little brackets so it stays in place during baking. Double check that the eye pin is still in the very center of the square shape before baking. Bake the mold following the baking instructions listed above.

When the mold is completely cool, carefully pinch it at the bottom to work the pendant piece out of the mold. If you have trouble pinching the baked piece out, you can try placing the mold in the freezer for a few minutes to release it. If there is any stray baked LS around the top of the molded piece, you can clean it up by trimming it with sharp scissors or a craft knife.

For the chain make extensions by placing a metal round bead, then a blue E-bead, then a metal tube bead, another blue E-bead, and a final metal round bead on an eye pin. Curl another eye in the tail of the eye pin with round nose pliers. Make four of these extensions.

Cut a 1” piece from your chain and hook two extensions together with jump rings and the 1” chain piece.

Finish the necklace as shown. Use a jump ring to attach the pendant to two more pieces of 1” chain. Connect a double extension to each of the 1” chains with jump rings. Attach the remainder of the chain to the top set of extensions with jump rings. If you wish you can cut the chain at the back of the neck and attach a clasp set with jump rings.
