
Liquid Sculpey® Layers of Liquid Pendant
Liquid Sculpey® Layers of Liquid Pendant
Read More
Read Less
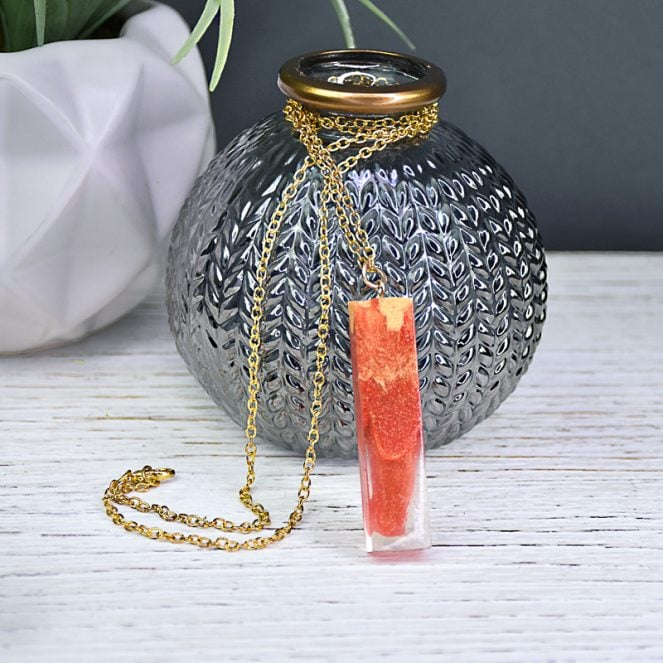
Liquid Sculpey® creates layers of your favorite colors that swirl elegantly together make a lovely statement piece for a pendant or necklace design.
TIME TO COMPLETION: 45 minutes to make and bake
ADDITIONAL SUPPLIES
• Paper towel
• Silicone miniature cupcake liner or small disposable cup
• Heat gun
• 1” Bright gold tone eye pin
• 6mm Bright gold tone jump ring
• Gold chain or beaded necklace of your choice
Project Instructions
- Getting Started:
- Baking:
This pendant is being shaped in the Rectangular cavity of the 3D Jewelry Mold. The mold is slightly clear so you can easily see how much liquid you are putting into it. Remove the cap completely from the Clear Liquid Sculpey® (LS). Stir the liquid completely with one of the purple clay tools. Clear LS will typically have some sediment in the bottom of the bottle. Mix the sediment back into the liquid as thoroughly as possible. Clean your tool with paper towel. Replace the cap on the Clear LS bottle. Squirt a layer of Clear LS in the bottom of the rectangle shaped cavity to about 1/3 full.

Next we will blend a maroon color. Remove the caps from the Red, the Bronze, and the Black LS. Stir each Red, Bronze, and Black LS with one of the purple clay tools. Clean the tool with paper towel after each color. Replace the caps. In the bottom of a silicone miniature cupcake liner squirt a quarter sized amount of Red LS. Add just a drop of Black LS and a drop of Bronze LS.

Stir the color completely with one of the purple clay tools that has a flat edge. At this point you can add more of any of the three colors to achieve the desired tone.

Carefully pour or drip a layer of the maroon on top of the Clear LS. The Clear and the maroon should make the mold about 2/3 full.

Very carefully dip the tip of the small Etch ‘n Pearl tool into the maroon. Dip it in far enough that you can swirl some of the maroon into the Clear with the tool. Pull the Etch ‘n Pearl back out and wipe it off with paper towel.

Remove the cap from the Gold LS. Stir the Gold LS with one of the purple clay tools. Clean the tool with paper towel. Replace the cap. Fill the remaining area in the cavity with the Gold LS. Swirl the Gold just slightly into the maroon with the Etch ‘n Pearl as you did in Step 6. Wipe the tool with paper towel. Make sure the Gold LS fills the cavity flush to the top.

Place the gold eye pin onto one of the rods that is included with the 3D Jewelry mold. Dip the tail of the eye pin into the liquid. Position the rod across the mold in the little raised brackets that hold the rod into place. Double check to make sure the eye pin is in the center of the rectangle shape. Bake the 3D Jewelry Mold following the baking instructions for LS. When the mold is completely cool, remove the piece by pushing up on the bottom of the mold. To make the Clear area even more clear, you can apply more heat with a heat gun. Turn the heat gun onto HI. Hold the heat 4”-6” away from the piece. Move the heat constantly over the surface of the piece. When the Clear area goes completely clear and shiny, turn off the heat and allow the piece to cool completely.

String the pendant as desired on a simple gold chain or beaded cord.
