
Liquid Sculpey® Icicle Inclusion Pendant
Liquid Sculpey® Icicle Inclusion Pendant
Read More
Read Less
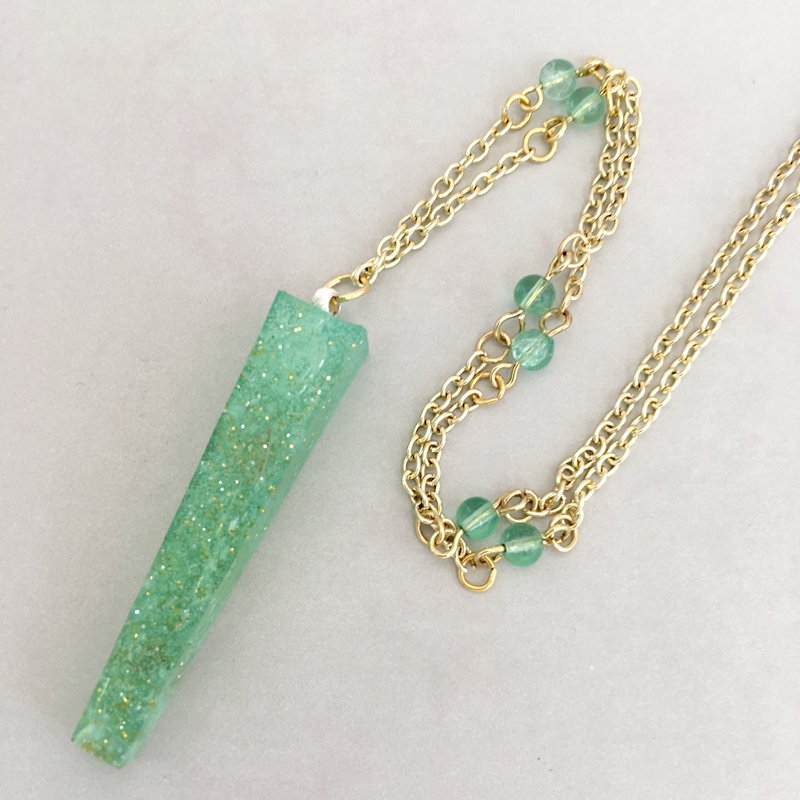
Liquid Sculpey® and glitter combine to make a sparkly necklace!
ADDITIONAL SUPPLIES
- Silicone resin icicle or crystal shaped mold
- Glitter
- Chain
- Monafiliment
- Crimp Bead
- Glass Dish
- Mini metal shaped pieces
- 12mm Jump Ring
- 6 Glass beads
- Aqua alcohol ink
Project Instructions
- Getting Started:
- Baking:
Cut a length of the monofilament at least twice as long as the length of your mold. Fold the monofilament in half and thread it through the large crimp bead. Under the large crimp bead, smash one of the smaller crimp beads in place with the pliers. Smash the second small crimp bead into place at the tail end of the monofilament

Lay the monofilament on a glass baking dish. I’m using glass here so that after the first baking, the monofilament will easily peel away from the glass. Place the monofilament strand next to the mold just so you can compare the two items for size. Stir the Clear Liquid Sculpey (LS) completely. Squirt a line of Clear LS along the monofilament. Position inclusions in the Clear LS on top of the monofilament. I place larger inclusions at the tops where my mold is wider and smaller inclusions toward the bottom where the mold is more narrow.

Bake the monofilament in the oven at 300 °F for 20 minutes just to set the Clear LS. When it is completely cool, snip off the extra length of monofilament and the bottom crimp bead with scissors.

Attach the 12mm jump ring through the top crimp bead

Stir the Clear LS completely. Pour a small amount of Clear LS in a paper baking cup. Add just a drop of aqua colored alcohol ink to the LS. Also add a little gold glitter and a little silver glitter. Mix all completely with one of the purple tools.

Stand the mold up using something to support it so it does not fall over. My mold has a square bottom and stood up perfectly in the Sculpey® Silicone Jewelry Mold. Place the monofilament with the inclusions inside the tall mold. Place the jump ring over the top of the mold so the monofilament stays in place. Carefully fill the mold with the tinted Clear LS. Tap the mold gently to allow air bubbles to float to the top. Place a damp cloth in the bottom of your baking pan. Place the filled resin mold and whatever you are using to keep the mold upright on top of the damp cloth. Bake at 275 °F for 20 minutes to set the shape. The wet cloth and the low baking temperature will help the piece to set without bubbles. After this first baking, remove the piece from the oven. Pre-heat the oven to 325 °F. Place the molded piece in the hot oven and bake for 20 more minutes to clear the Clear LS.

When the piece is completely cool, carefully remove it from the pan. Place in a freezer for just a few minutes. The cold will help the molded piece release from the mold. When you see the molded piece releasing along the side, you can carefully pull it out of the mold with the jump ring on top.

Remove the 12mm jump ring. Connect the open jump ring at the top to the chain with a 6mm jump ring. String one glass bead onto each of the eye pins. Trim the eye pins to 1/2” from the glass bead. Use the round nose pliers to turn an eye into the trimmed end so that the glass bead has an eye on each side. Repeat for all six glass beads. Cut the chain 1.5” away from the molded piece on each side. Add a bead to each side connecting it with 4mm jump rings. Connect 1.5” of chain to the other side of the glass bead. Repeat two more times so that each side of the chain has three glass beads attached in 1.5” intervals with jump rings
