
Liquid Sculpey® and Wire Bullet Pendant
Liquid Sculpey® and Wire Bullet Pendant
Read More
Read Less
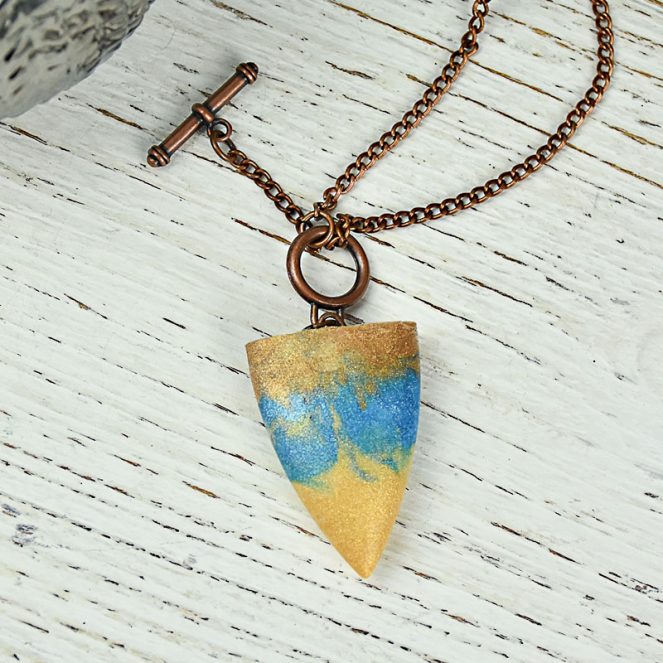
Liquid Sculpey teams up with the new Sculpey mold to make a pendant with the bullet shape - 10% rugged and 90% beautiful = a 100% awesome look!
COMPLETION TIME:45 minutes to make and bake
ADDITIONAL SUPPLIES
• Paper towel
• Sharp scissors or a craft knife
• Heat gun - optional
• 4mm x 6mm Antique bronze oval jump ring
• 4mm Antique bronze jump rings (3)
• 20” Antique bronze chain
• Antique bronze toggle & loop clasp
• Flat nose jewelry pliers
Project Instructions
- Getting Started:
- Baking:
Fill the bottom 1/3 of the bullet shape in the 3D Jewelry Mold with Gold Liquid Sculpey (LS). Tap the mold on the work surface to release air bubbles.

Use the tip of one of the Etch ‘n Pearls inserted all the way through the Gold LS to make absolutely sure that there is not an air bubble in the very tip of the bullet shape. The bullet shape has a beautifully crafted point and you want this to show in your finished piece. By inserting the tool all the way down into the tip you ensure that the LS is filling the point. Withdraw the tool and wipe away excess from the tool with paper towel.

Add a layer of Peacock Pearl LS next on top of the Gold LS. Use the flat shaped scoop tool to carefully push some of the Peacock Pearl LS into the Gold LS around the edges. Clean the tool with paper towel.

Fill with more Peacock Pearl LS to fill the mold 2/3 full. Tap the mold on the work surface again to release air bubbles.

Next add a layer of Bronze LS. Use the flat shaped scoop tool to carefully push the Bronze LS into the Peacock Pearl LS creating a blended area all along the edges. Remove the tool and wipe it clean with paper towel. Back fill the mold completely with Bronze LS. Tap the mold on the work surface again to release air bubbles.

For the finding attachment I have chosen an oval shaped jump ring.

Slide the jump ring onto one of the rods that is provided with the 3D Mold.

Carefully dip the jump ring into the Bronze LS bullet shape. Position the rod into the little raised brackets that are built into the mold. These little brackets will hold the rod perfectly in line with the Bullet Shape while the piece bakes. Bake the mold following the baking instructions.

Determine which side of the baked piece you will call the front. If you wish, you can bring out the depth of the colors by hitting the piece with a little more heat. Place the piece on a heat proof surface and turn the heat gun onto high. Move the heat over the front of the piece at a distance of 4”-6” constantly moving the heat blast in a circular motion. You will see the piece go very shiny and glossy when it has reached maximum gloss. Turn off the heat gun immediately so you don’t burn the piece. Using a heat gun can definitely take some practice. Add a jump ring to the oval ring that was baked into the clay piece. Attach the same jump ring to the loop of the toggle set. Attach a jump ring to each of the ends of the chain. Connect one of the jump rings to the toggle and the other to the loop. Close all the jump rings with flat nose jewelry pliers.
