
Liquid Sculpey® Bezeled Crackle Pendant
Liquid Sculpey® Bezeled Crackle Pendant
Designed by Amy Koranek
Read More
Read Less
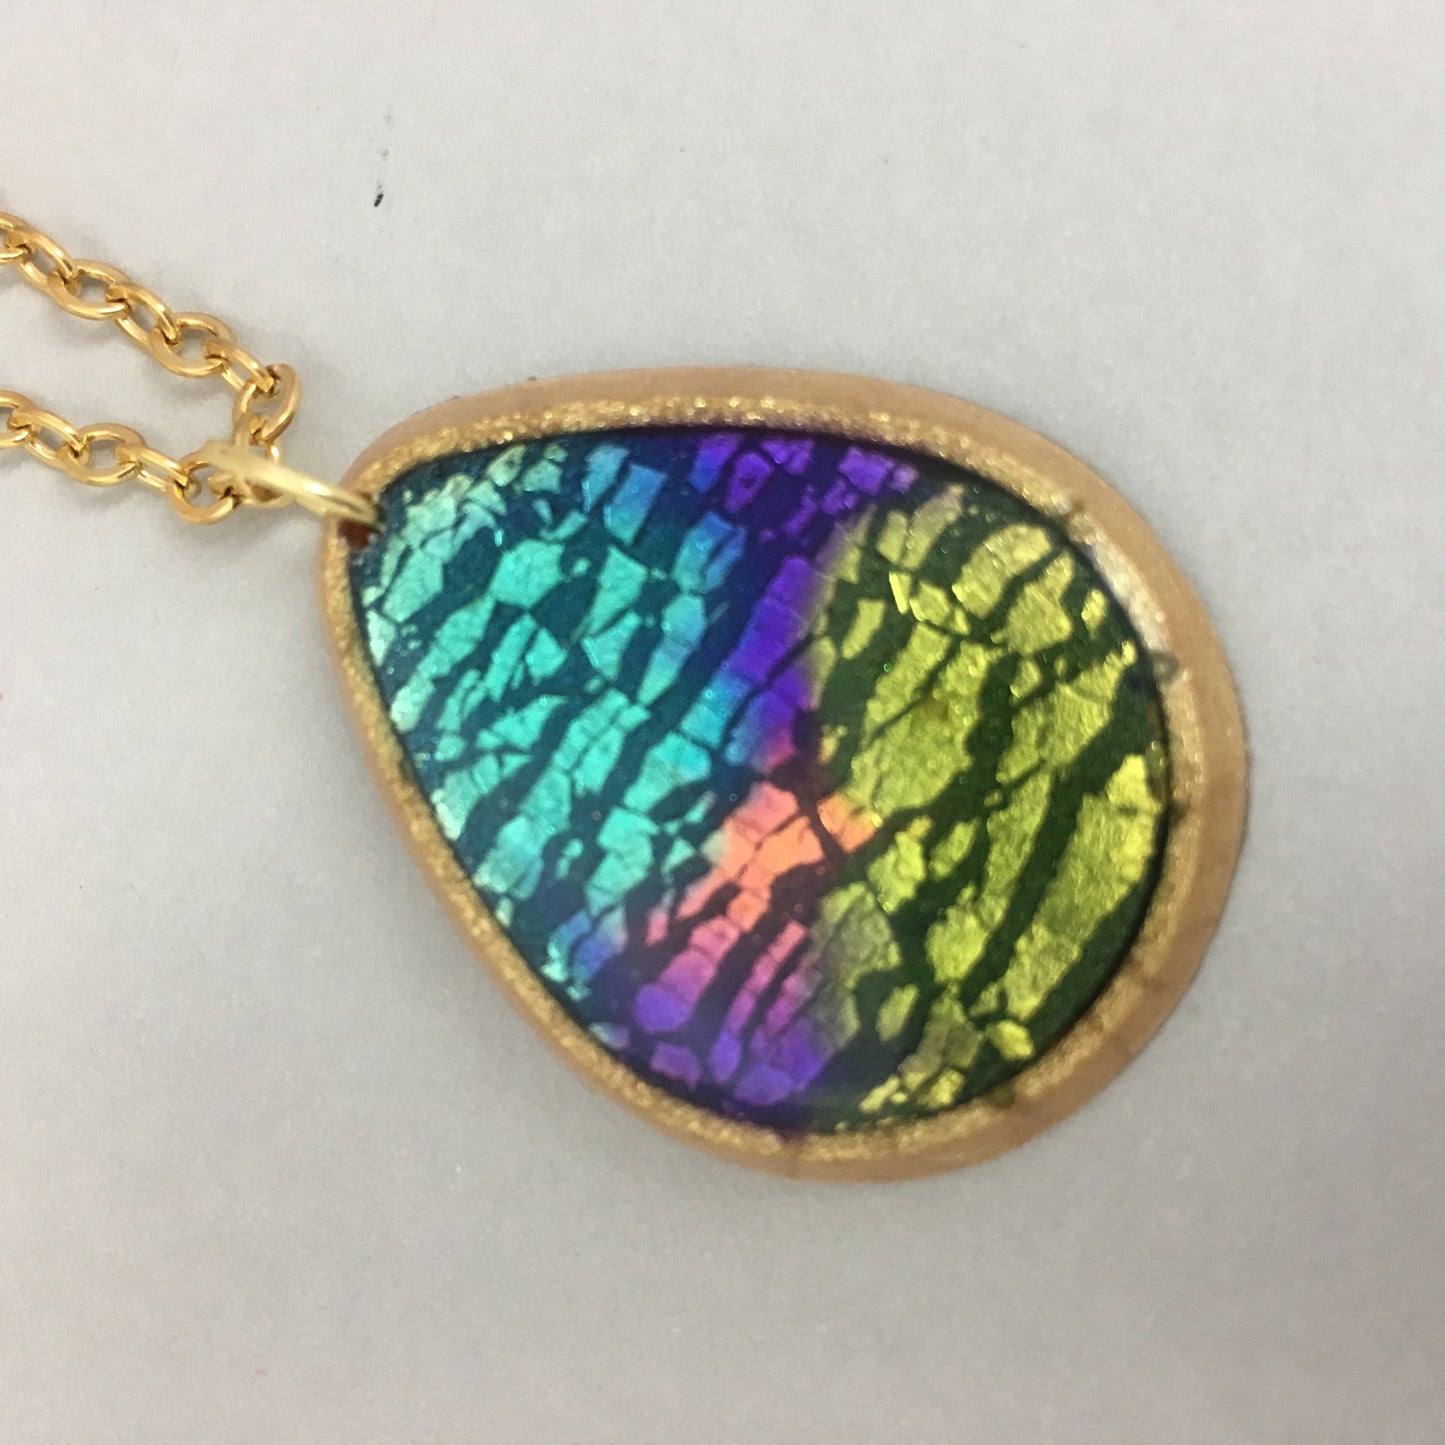
Liquid Sculpey® teams up with gold leafing material to create a spectacular multi-colored pendant with a flash of gold beneath the colors.
ADDITIONAL SUPPLIES
- Gold composite leaf
- Craft knife or X-acto type knife
- Paper mini cupcake liners
- Mini cupcake baking tray
- Alcohol inks in your chosen colors - lime green, purple, light blue, and orange
- Dull tipped stirring tool like a knitting needle
- Pin drill or Dremel drill or Dremel Stylo for making a hole after baking
- 8mm-10mm Gold tone jump ring
- Gold tone chain with clasp
- Jewelry pliers - flat nose
Project Instructions
- Getting Started:
- Baking:
First you’ll need to make a bezel to house your crackle art. Pre-heat the bezel mold by placing it in your oven at 275 °F for 15 minutes. While the mold is warm, hold the tip of the Gold LS very close to the thick edge of the bezel shape - but don’t touch the LS tip to the hot mold because it will make a hardened piece of clay on the bottle tip. Fill the thick edge of the bezel first all the way around. Then fill in the flat part of the bezel. Bake the bezel mold at 275 °F for 15 minutes. If it makes a bubble in the flat area, remove it from the mold as quickly as you can and be sure to protect your fingers from the heat. Lay it flat on it’s back and place a book on top of it to flatten it back out while it cools.If there is no bubble, you can let the clay piece cool in the mold.

Sheet Graphite Pearl through the pasta machine on the thickest setting.

Place a sheet of gold composite leaf over the sheet of Graphite Pearl clay. Burnish the leaf down with your fingers so there are no air bubbles.

Sheet the clay with the gold leaf through the pasta machine on the thickest setting. Then again on the second thickest setting. You should see crackling once the thickness is reduced.

Sheet the clay through on the third thickest setting to get even more crackling and to thin the clay so that it sits below the bezel edges.

Use the bezel shape that you made in Step 2 to mark the shape you need to fill it. Place the bezel upside down on the clay and press it down enough to transfer the shape into the sheet of clay/gold leaf.

Carefully cut out the shape with a sharp knife. Transfer the piece to the bezel, trimming as needed. Use a lot of finger pressure to make sure the shape sits down tightly into the bezel.

Decide how many colors of Clear LS you will want to tint. You will need one paper liner for each color. I made four different colors. Place the paper liners in the cupcake holder as shown. This will give the paper cups more stability and make it easier to mix the colors. I filled each mini cupcake liner about 1/2 way with Clear LS. This is way more LS than you will need for one pendant, but the alcohol inks are super concentrated and I wanted the colors to remain transparent so the crackle effect would show through. I made lots of extra pendants with the left-over LS. Add one drop of alcohol ink to each well. I did a purple, a light blue, a lime green, and an orange. Stir each one completely with a dull tipped tool (like a knitting needle) so that you don’t tear holes in the paper liner.

Use the tip of the knitting needle to move the liquid around as needed. Make sure the liquid goes all the way to the inside edges of the bezel shape but don’t let it overflow.

Keep adding colors a you like until the bezel is filled but not overflowing.


Bake the bezel piece at 325 degrees F for 10-15 minutes or just until the liquid goes completely clear and shiny. Please monitor your oven closely during this time as the Gold LS bezel and the Graphite Pearl Premo can be burned at this temperature if baked for too long of time. When the piece is completely cool, drill a small hole at the top with a pin drill or Dremel tool. Add the jump ring and the chain and enjoy!

Use up the remainder of the tinted Clear LS as quickly as you can. If it is allowed to sit in the paper liners for more than 36 hours, the plasticizer will seep through the paper and the LS will be unusable. Once you’ve used up all the product, you can simply bake the paper liners to set the residue and then dispose of them in the trash. Baked LS can be peeled away from the pan as well and discarded.