
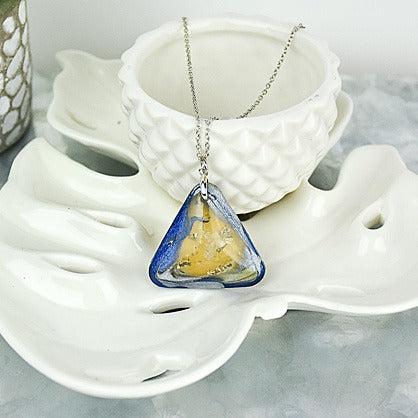
Liquid Sculpey® Amber Flow Necklace
Liquid Sculpey® Amber Flow Necklace
Designed by Amy Koranek
Read More
Read Less
Gold sparkles are captured inside a flow of Amber, Silver, and Metallic Navy.
TIME TO COMPLETE: 45 Minutes to make and bake
ADDITIONAL SUPPLIES
- Paper towel
- Gold composite leaf
- Tweezers
- Bright silver tone pinch bail
- 6mm Bright silver tone jump ring
- 18”-24” Bright silver tone chain necklace with clasp
- Heat gun
- Flat nose jewelry pliers
Project Instructions
- Getting Started:
- Baking:
I actually made three of these cabochon pieces while aiming to get just one good one. But they all turned out pretty - so here are the instructions for all three!
First we need to stir the liquids. Remove the caps from the Liquid Sculpey® (LS) colors. Stir each color with one of the tools and clean the tool with paper towel after each color. The Clear LS will have a lump of sediment in the bottom of the bottle. Stir this lump completely into the liquid. Clean the tool with paper towel. Replace the caps to each bottle. Now we are ready for the fun!
Next place a small amount of Clear LS in the shapes that you want. You can see that I did not fill more than half way up.
Then, with tweezers, tear off flakes of composite gold leaf and drop these into the Clear LS. Note that composite gold leaf works much better than real gold leaf because it is much less expensive and it does not tarnish inside the liquids.

Use the tip of one of your tools to gently stir the bits of composite gold leaf into the Clear LS. Tap the mold on the work surface to release air bubbles.

Back fill each of the cavities on top of the Clear LS with Translucent Amber LS. You can see that I still did not fill the cavities completely full yet.

Add swishy areas of Silver LS as a border but not all the way around the shape.

Add swishy areas of Navy Metallic LS (the round shape has Garnet Metallic LS) around the edges.

To create the partial blending, swirl the needle tool through the colors just around the edges. Do not place the needle tool down into the center, just stay out near the edges. Store around the edges of the shapes with the needle tool 2-3 times.

At this point, if the cavities are not full to the top with liquid, add a few drops of the Clear LS to fill them all the way up. Tap gently again to release air bubbles.

Bake the pieces following the baking instructions for LS. When the mold is completely cool, gently flex it to release the shapes. I chose to make the colors even deeper and to turn the Clear LS completely clear and shiny with a heat gun. Turn the gun on HI. Keeping the heat at a distance of 4”-6” from the pieces, constantly move the heat over the tops. When the Clear goes completely clear and the surface becomes shiny, turn off the heat. You can see tiny black spots on both the round piece and the teardrop shaped piece. These little spots are where I applied the heat for too long and they actually started to burn. Sometimes this can be cleaned up with a sharp craft knife by shaving the burned spots off. But it’s best to just be careful and go slowly enough to stay in control with the heat gun.
Allow the pieces to cool completely. Trim any excess drips from the edges with sharp scissors or a craft knife.
Allow the pieces to cool completely. Trim any excess drips from the edges with sharp scissors or a craft knife.

To assemble this necklace I decided to use a pinch bail. The pinch bail is a perfect accessory for Liquid Sculpey® pieces because it has sharp prongs that can be forced into the surface of the cured liquid.

Use flat nose pliers to gently start to close the bail until it is just open enough to accommodate the thickness of the pendant.

Place the bail where you want it, then finish forcing the bail shut with the pliers. The front prong should penetrate the front of the pendant and the back prong should go into the back making a secure hanger.

Add a jump ring and run the necklace chain with clasp through it.

- Choosing a selection results in a full page refresh.
- Opens in a new window.