
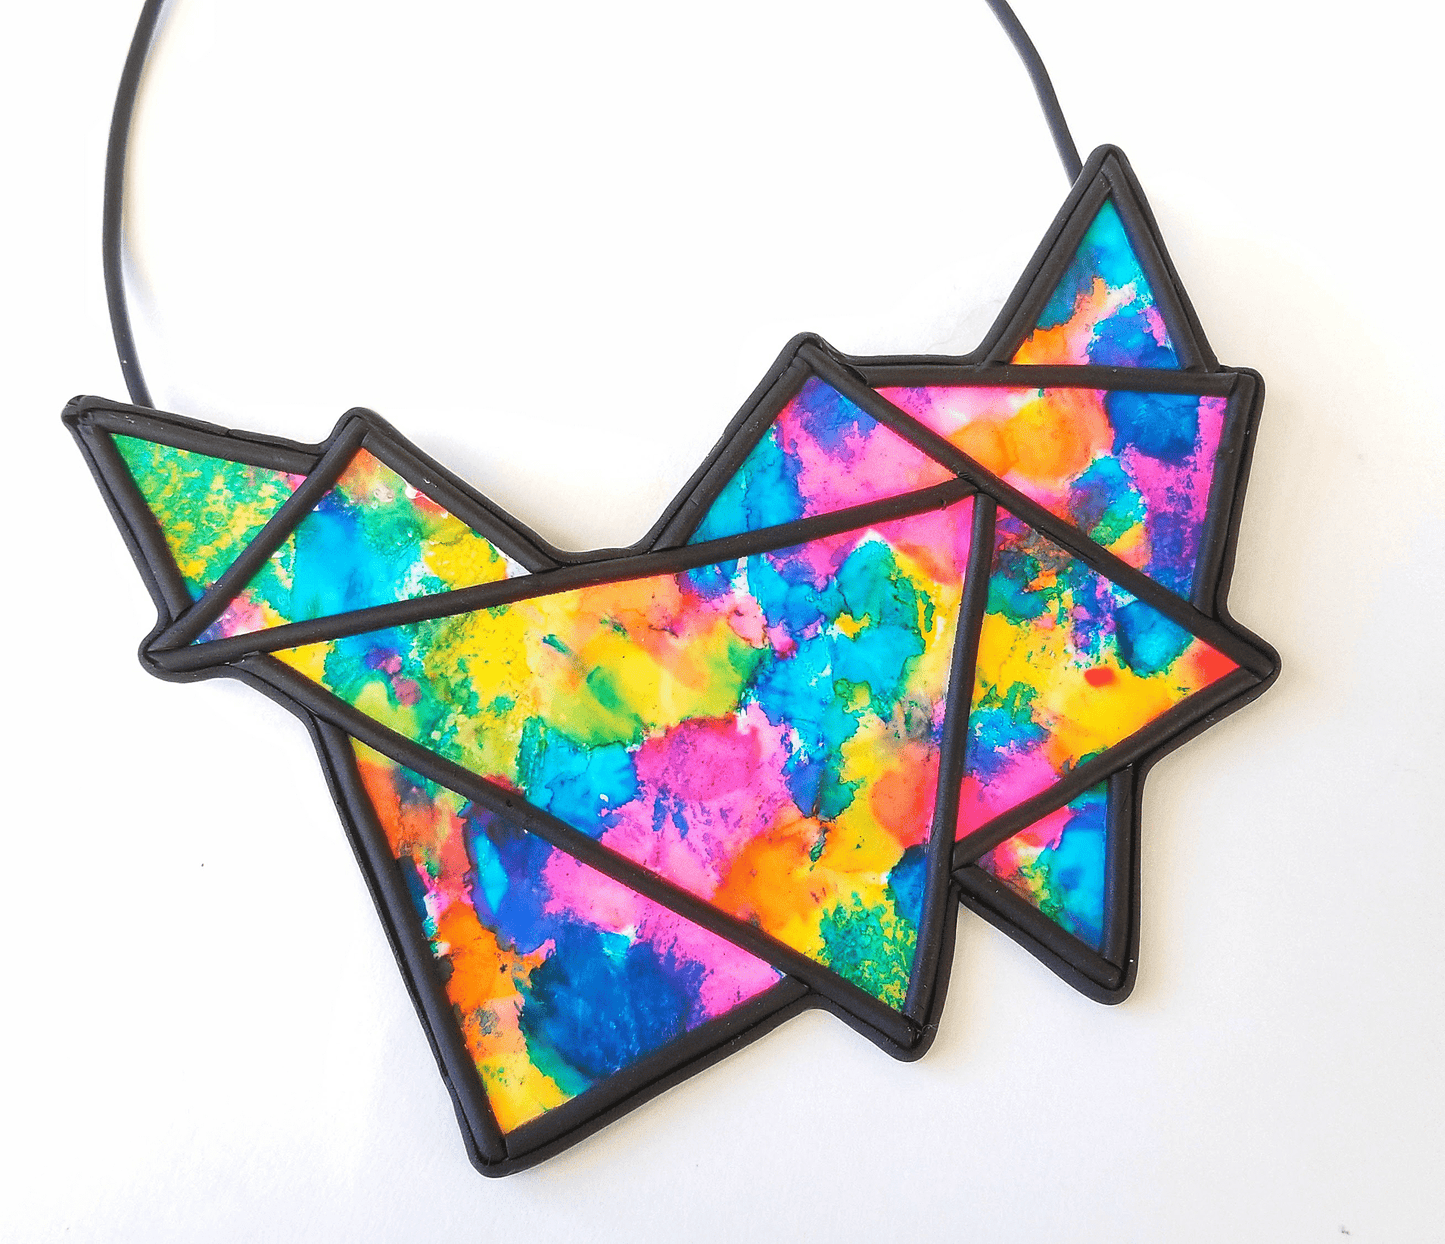
Liquid Sculpey® Clay Geo Bib Necklace
Liquid Sculpey® Clay Geo Bib Necklace
Designed by Syndee Holt
Read More
Read Less
It looks challenging, but it was surprising easy and FUN to create!
ADDITIONAL SUPPLIES
- Alcohol inks – I prefer Pinata (for bright, saturated colors) or Tim Holtz Adirondack inks (for more subtle colors)
- Cotton balls or pads
- 8 x10 smooth tile or sheet of glass
- Extruder with the round die and half round die
- Small paddle or stiff piece of paper to spread the liquid clay
- Exacto blade
- Template
- Rectangular cutter (mine is from the Leather Cutter, 39 pieces set)
- 20 inches of black cording
- Gel type instant glue
- Small piece of texture for the back of the bib (optional)
- Black Sharpie for drawing template
- Sheet of plastic for template
Project Instructions
- Getting Started:
- Baking:
Leave the baked clay on the sheet of glass and start adding the inks by put random drops on the sheet and blotting them immediately with a cotton pad or ball. Repeat with the other colors to fill the sheet of clay with glorious color!


While the ink is drying on your sheet of baked Clear LS, create the tracing template. You can either use my template attached or draw your own. Put the printout under a piece of Stencil Template plastic and Draw the design using a Sharpie. Cut out your template.


Place the template on top of your sheet of inked LS. Selecting your favorite area of course! NOTE: I kept the sheet of LS on the glass so that I could cut out the template without any slipping. Use a sharp Exacto blade to cut out the clay using the template.


Roll out a sheet of Premo White on the second to widest setting on the Clay Conditioning Machine making sure that it is large enough to accommodate the cut out portion of the inked LS. (Use the template to measure with not the actual clay!) Roll out a sheet of Premo Black on a setting one size thinner than the White clay and layer the White clay on top. Double check that you have enough area for the bib using the template.NOTE: You can substitute Premo Accents Pearl for the White clay to have a lovely sparkle under your inks!
Place the sheet of trimmed and inked LS on the stack of White and Black clay and firmly rub the sheet of LS so that it will make good contact with the White clay. (NOTE: the acrylic roller can be used as well!) Use your Super Slicer blade to trim the clay to the shape of the LS sheet.

Select the single circle and the half circle die and stack them together to create a smaller half circle shape. Extrude a length of the remaining conditioned Premo Black clay using both dies together.

Carefully start laying strips of the extruded Black clay to create the same lines as your template. (You will note that I’m using a sheet of “practice” clay here to make sure I know how to make the cuts at the seams!) This step is actually easier than it seems, just follow the lines of the shape while referencing the stencil.

I added another strip of the extruded clay to the outside lines of the bib, as shown. This will create a solid black outline with no evidence of the layers beneath. Set aside.

Roll out a small piece of the remaining Premo Black clay and cut out two small rectangles. (I used a cutter, but you can hand cut these rectangles as well.) Press the rectangles around a knitting needle that is slightly larger than the cording you plan to mount the bib on.

Roll out two small balls of Premo Black and make holes large enough to accommodate your cording.

Bake the bib and the black rectangles and beads according to the directions in Step 1 above. Make sure to turn the oven back down to your normal baking temperature!
Once the clay has baked and cooled, glue the rectangles into place on either side of the top of the bib. Thread the cording through the rectangles and glue the clay beads on the bottom of the cording to hold it in place. Now you can cut the cording at the top center and add your findings. Done!

