
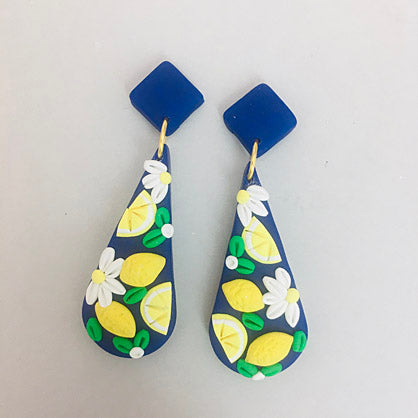
Sculpey Premo™ + Sculpey Souffle™ Elongated Teardrop Earrings
Sculpey Premo™ + Sculpey Souffle™ Elongated Teardrop Earrings
Designed by Amy Koranek
Read More
What says Summer more that blue skies and lemonade? These clever earrings, created with both Sculpey Premo and Souffle, sure evoke that “Summer Feeling”!
Read Less
ADDITIONAL SUPPLIES
- Gold tone earring posts and backs (2)
- 8 mm Gold tone jump rings (2)
- Silicone glue or instant drying glue
- Flat nose pliers

Project Instructions
- Getting Started:
Start with clean hands, unwrap and knead clay until soft and smooth, or condition by running clay though a Pasta Machine. We recommend using a designated machine for clay purposes only. When working with multiple colors, clean hands with soap and water or baby wipes (we have found that baby wipes work best) before switching colors. Shape clay, pressing pieces firmly together. Wash hands after use.
- Baking:
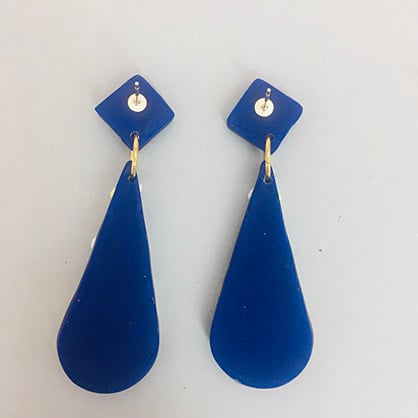
From 1/8 bar of Ultramarine Blue Hue Premo™, make a long teardrop shape. Place it in the elongated teardrop cavity in the mold.

Flatten the teardrop of clay to fill the cavity.

Shave excess clay away with the Clay Blade so it is level in the cavity.

Carefully remove the clay piece from the mold by gently flexing the mold.
Follow Steps 2-5 to make a second elongated teardrop.

From Soufflé™ Canary, make four little lemon shapes and position them as shown so that the earrings are mirroring each other.

Stipple the lemons with one of the Clay Tools.
For the lemon slices, make a small disc on the work surface in Premo™ Sunshine and flatten it really flat. The little disc should be about 1/4” wide.
In the center of the disk, flatten a very thin Premo™ White disc.
Then finally flatten a smaller disc of Premo™ Sunshine in the very center.
Cut the discs in half so that each one is half round.
Position two of the lemon slices on an earring and score little section lines with the Needle Tool.
Repeat this entire step to make another set of lemon slices for the second earring.

Next, make tiny White petals and arrange them in partial circles on each earring. Place a dot of Sunshine in the center of each one. Score little lines in the petals with the Knife Tool.

Next, fill in the negative spaces with tiny leaves of Premo™ Green. Score texture in the leaves with the Needle Tool and add White dots as shown.
Roll the scraps of Ultramarine Blue Hue to a little sheet 1/8” thick. Cut out two squares using the 1/2” square mini geometric cutter. Turn them so they look like diamonds
Roll the scraps of Ultramarine Blue Hue to a little sheet 1/8” thick. Cut out two squares using the 1/2” square mini geometric cutter. Turn them so they look like diamonds

Poke holes in the bottom tip of the diamonds and in the top of the elongated teardrops.
 Poke holes to attach earring pieces together
Bake the pieces following the baking instructions above. Allow the pieces to cool completely before handling. Lay the pieces out as shown for assembly.
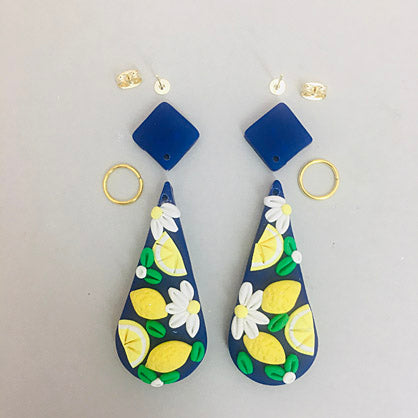
Use flat nose pliers to open the jump rings connecting the diamonds to the teardrops. Close the jump rings using pliers.
Glue ear posts to the backs and allow to dry completely before handling.
- Choosing a selection results in a full page refresh.
- Opens in a new window.