
Sculpey Premo™ + Sculpey Souffle™ Textured Earrings
Sculpey Premo™ + Sculpey Souffle™ Textured Earrings
Designed by Amy Koranek
Read More
Read Less
These dimensional lace textured earrings are created with a custom color from the Sculpey Premo™ + Sculpey Souffle™ Multi Pack of colors. Of course, YOU can create your own custom colors from this pack to create your own version of this clever project!
COMPLETION TIME: 45 Minutes to make, bake, and assemble
ADDITIONAL SUPPLIES
- Square & Circle Premium Clay Cutters by Craft Smart®
- 6 mm Gold tone jump rings (4)
- 8 mm Gold tone jump rings (2)
- 10 mm Gold tone jump rings (2)
- Ear Posts with back (2)
- Silicone glue or instant drying glue
- Flat nose pliers
Project Instructions
- Getting Started:
Start with clean hands, unwrap and knead clay until soft and smooth, or condition by running clay though a Pasta Machine. We recommend using a designated machine for clay purposes only. When working with multiple colors, clean hands with soap and water or baby wipes (we have found that baby wipes work best) before switching colors. Shape clay, pressing pieces firmly together. Wash hands after use.
- Baking:
First, we will make a Light Sea Glass color from the colors in the Multi Pack. Each bar in the Multi Pack is a 1 ounce size and the amounts given here are based on this smaller bar size. You will need:
1/2 bar of Igloo
1/4 bar of Sea Glass.
Mix these two colors together completely. Roll the Light Sea Glass into a sheet 1/8” thick with the Acrylic Clay Roller. Make sure the sheet will accommodate two of the large square cutter shapes.
1/2 bar of Igloo
1/4 bar of Sea Glass.
Mix these two colors together completely. Roll the Light Sea Glass into a sheet 1/8” thick with the Acrylic Clay Roller. Make sure the sheet will accommodate two of the large square cutter shapes.

Use the Lace Mold like a texture sheet. Place it on top of the clay with the texture side down and press as hard as you can with your fingertips to help the mold bite into the clay. Once the mold has started to sink into the clay, you can use the Acrylic Clay Roller to make the texture deep and even. Carefully peel the mold away from the clay.

Cut out two of the large square shapes. For this project we will turn them like diamonds.

Cut out the center of each diamond shape with the small circle cutter. These circle shapes will be the top section of the earrings.
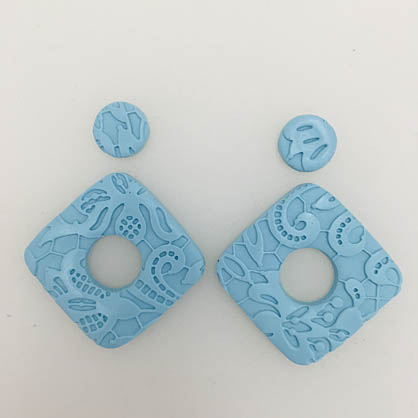
Now we will add details to the outside edges of each diamond to make them look scalloped. Start by using the small square cutter to cut out a triangle shape in the center of each of the four edges.

Then use the side of the Needle Tool to push in a little scallop halfway between the cut away triangle and the corner. There should be a total of eight scallops, two per side.

Layout your earring design as you want it to be assembled. Poke holes for the jump rings (which we will add after baking) with the Needle Tool.
Bake the pieces following the baking instructions in Step 1 above.
Bake the pieces following the baking instructions in Step 1 above.

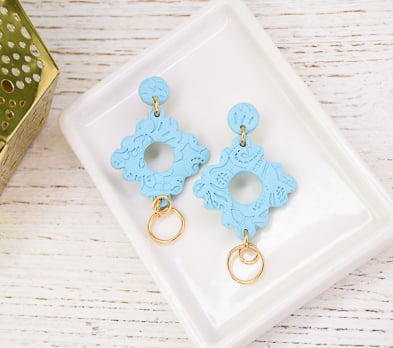
Allow the pieces to cool completely and then lay them out as shown.

Connect the top and bottom pieces with 6mm jump rings using flat nose pliers.
Connect the larger jump rings to the bottom with another 6 mm jump ring.

Glue the ear posts to the back and allow to dry completely.

- Choosing a selection results in a full page refresh.
- Opens in a new window.