
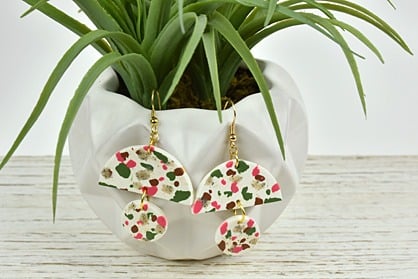
Premo Sculpey® Faux Terrazzo Earrings
Premo Sculpey® Faux Terrazzo Earrings
Designed by Amy Koranek
Read More
Read Less
The classic style and process for terrazzo lends itself perfectly to this Premo Sculpey® interpretation that is actually quick easy and fun to do!
ADDITIONAL SUPPLIES
- Gold tone jump rings - large (4) /Gold tone jump rings - small (2) /Gold tone ear wires (2)
- Deli paper
- Flat nose pliers
Project Instructions
- Getting Started:
Start with clean hands, unwrap and knead clay until soft and smooth, or condition by running clay though a Pasta Machine. We recommend using a designated machine for clay purposes only. When working with multiple colors, clean hands with soap and water or baby wipes (we have found that baby wipes work best) before switching colors. Shape clay, pressing pieces firmly together. Wash hands after use.
- Baking:
Sheet 1/4 block of White into a sheet about 1/8” thick with the Acrylic Roller. Make sure the size of your sheet will accommodate one circle 1.5” in diameter and two circles .75” in diameter by scoring the sheet with the circle cutters.

Pinch all colors and press them onto the White sheet. Doing the darkest colors first - Spanish Olive and Raw Sienna, then Blush and Gray Granite last. It’s good if some of the bits extend over the edges of the scored circle lines so they look really random.

Roll over the sheet with the Acrylic Roller to make all the little color chips sink into the background White sheet. Stop rolling as soon as the surface looks mostly level.

Cut out the 1.5” circle with the circle cutter. Cut this large circle in half with the Super Slicer. Cut out two .75” circles as well.

Using the needle tool from the 5 in 1, carefully poke holes in the shapes so you can assemble the clay pieces with jump rings. You need one hole in the top curve of the half rounds, one hole directly below this one along the bottom edge of the half round, and one hole in the top of each of the little circle. Keep the holes at least 1/16” away from the edge and make sure the clay does not tear or open up between the hole and the edge. Poke the Needle Tool through from the back side as well to make sure the holes are super neat.

Bake the clay pieces following the baking instructions for Premo. When they are completely cool, assemble as shown using flat nose pliers to open and close the jump rings.
