
Liquid Sculpey® Primary Color Splatter Earrings
Liquid Sculpey® Primary Color Splatter Earrings
Read More
Read Less
Make a pair of earrings with Liquid Sculpey® Primary Colors and the Sculpey® Silicon Jewelry mold with metal splatters, grungy or modern – or both!
ADDITIONAL SUPPLIES
- Little spoon or scoop
- Paper towels
- Acrylic paint, gold or silver
- Old tooth brush
- Jewelry pliers and jewelry glue
- Earring posts
- Jump rings
Project Instructions
- Getting Started:
Start with clean hands, unwrap and knead clay until soft and smooth, or condition by running clay though a Pasta Machine. We recommend using a designated machine for clay purposes only. When working with multiple colors, clean hands with soap and water or baby wipes (we have found that baby wipes work best) before switching colors. Shape clay, pressing pieces firmly together. Wash hands after use.
- Baking:
The red grungy earrings: Set up your material: the red and black liquid clay, your jewelry mold, the cabochon mold (optional) and a skewer. You want to have your paper towels ready as well. For this project you will need to work quickly so the liquid clay does not level in your mold before you have added the clay for your pattern! First add some red clay in the middle of the spiky oval shape and the little drop shape (I found that this shape looks nicer in this design.) Leave the ends of the shape free of red clay.

Then add some liquid black clay at the tips of your shape. You might need to help the clay with your needle tool to flow around the hole tip! The mold should be about 1/3 filled at this point.
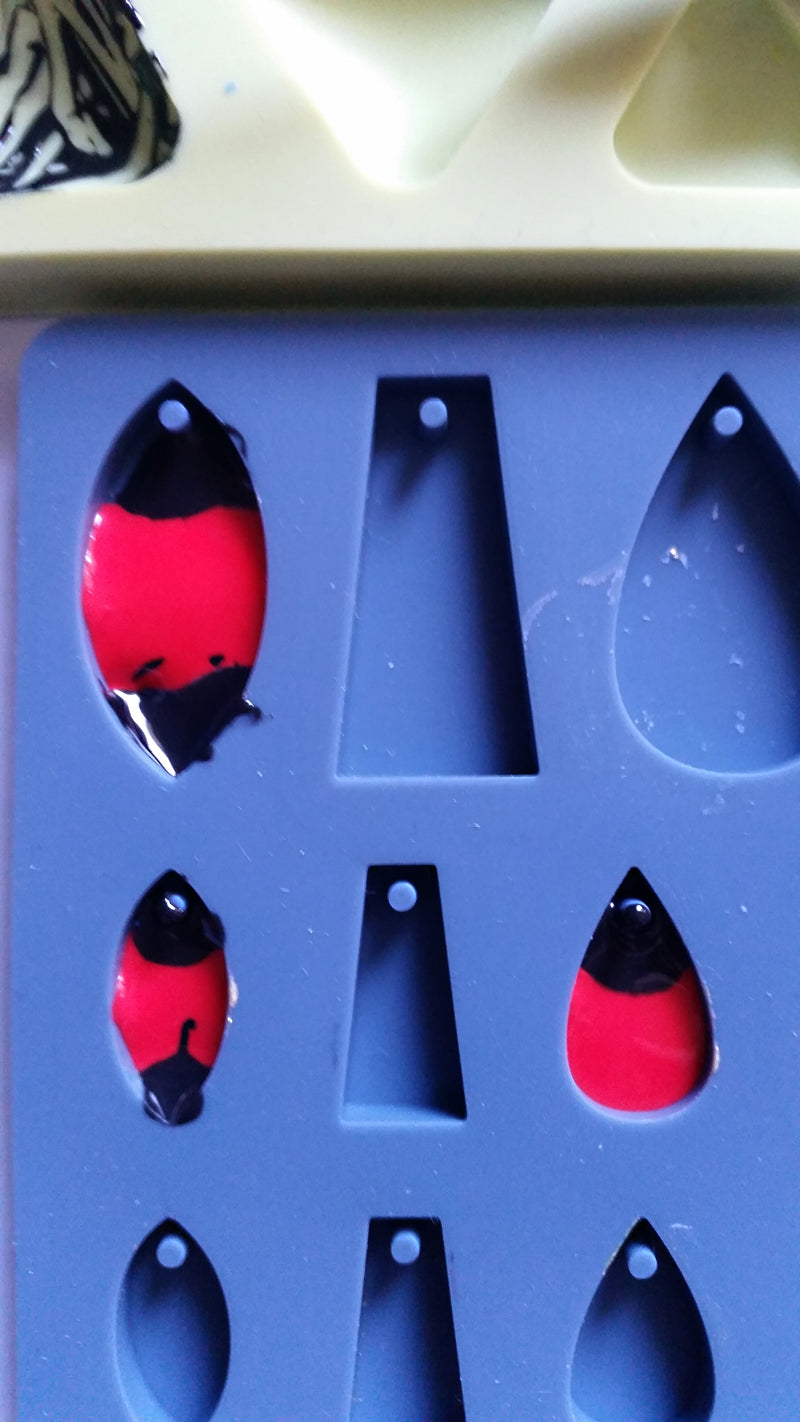
Add more red and black clay to fill up the mold. It helps to add only a little bit and then change to the other color again. You do not want to have a lot of one color. Because it will push the other color out of the way. Be careful and quick with filling your mold!

When you have filled your mold all the way to the top it should look similar to the picture: the black is mostly at the tips of the mold and the red fills up all of the middle part.

Now take the needle tool and drag some of the black clay into the red and form little spikes with it. You can make as many or little as you like. Cure the earring components as directed in Step 1. When the clay has cooled completely you can add splatters of gold with the acrylic paint and the tooth brush. Let them dry and Assemble your earrings with a jump ring between the drop shape and the larger spiky shape. Glue an ear post at the back of the drop shape.

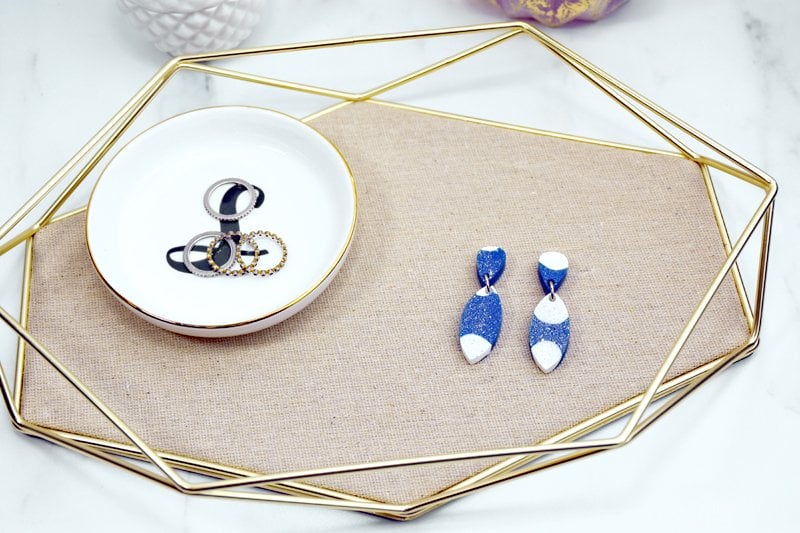
How to make the blue modern earrings: Follow the direction of the red earrings, just using blue and white instead of red and black liquid clay. The liquid white clay is often very viscose and so it presses the blue clay further to the middle. Don’t drag the white clay into the blue and use silver for the acrylic paint splatters!

