
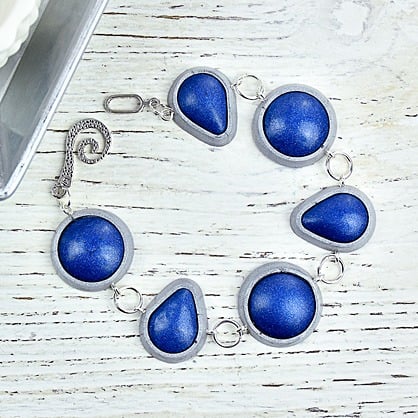
Liquid Sculpey® Navy Cab and Silver Bezel Bracelet
Liquid Sculpey® Navy Cab and Silver Bezel Bracelet
Design by Teresa Pandora Salgado
Read More
Read Less
The classic color team of Navy and Silver shine in this bracelet created with Liquid Sculpey® and the Sculpey Tools™ Cabochon and Bezel molds.
TIME TO COMPLETION:90 minutes including baking and assembling
ADDITIONAL SUPPLIES
- Superglue
- Eye Screws
- Jump Rings
- Clasp
- Jewelry Pliers
Project Instructions
- Getting Started:
- Baking:
Fill the Sculpey Bezel mold (I chose small triangle and small round) with
Sculpey Liquid Silver.

Fill the matching shapes In the Sculpey Cabochon Mold with Navy Metallic.

Place molds on a tile and tap the tile on your work surface. Allow the
liquid to settle for 5 minutes. If bubbles rise to the surface, pop them with a toothpick. Bake at 300
for 20 minutes. Repeat for the number of pieces needed to make the size bracelet you wish.

Glue the cabs into the bezels. Let them dry.

Make a pilot hole on each side of the bezels. Insert eye screws.

Join the pieces together with jump rings and add a clasp.
