
Liquid Sculpey® Layered Paperweight
Liquid Sculpey® Layered Paperweight
Designed by Amy Koranek
Read More
Layers and layers of beautiful Liquid Sculpey® colors stack up in this beautiful paperweight design. This style project also makes a nice place to empty out small amounts of left over liquids. Just place the leftovers in the mold, bake, and keep adding leftovers in layers (baking between each one) until the mold is filled completely.
TIME TO COMPLETE:
4 Hours to make and bake - each layer was par-baked for 15 minutes so that the layers would remain separate
Read Less
ADDITIONAL SUPPLIES
- Paper towel
- Pyramid shaped silicone mold
- Chunky glitter
- Small silicone cup or glass dish for mixing liquids
- Rubbing alcohol
- Cotton swab
Project Instructions
- Getting Started with Liquid Sculpey®:
- Getting Started with Liquid Sculpey®:
- Baking:
- It is important to use oven thermometer when you bake the liquids so that you can ensure your oven is at the correct temperature.
- Do not microwave the liquids. They must be baked in a Preheated oven at 275 ºF (130 ºC) for liquid colors and 300 ºF (149 ºC) for Clear – Do not exceed baking temperatures.
- If your piece is less than 1/4” bake for 15 minutes. For thicker pieces that are 1/4” or above bake for 30 minutes.
- If your liquid project has become yellowed or discolored in the oven, when you remake it, tent it by placing either – folding an index card in half and placing your project under it or by using aluminum foil over your project.
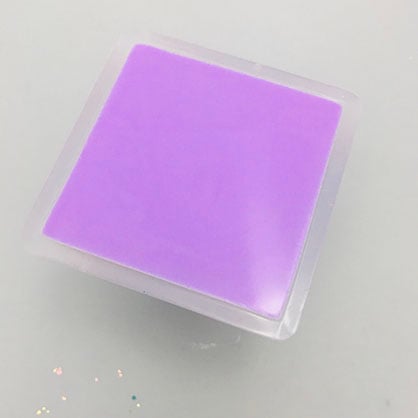
Fill the tip of the pyramid shaped mold with a 1/2” depth of Amethyst Pearl. Anytime I use Liquid Sculpey® (LS) in a mold that has a pointed shape, I use the Needle Tool to poke through the LS into the tip of the mold to make sure there is not trapped air in the small space. I tap the mold on the work surface gently to release air bubbles. I am careful to always keep the mold level because allowing the LS to creep up the sides between layers will create a breach in the layers that will be visible after baking. Bake the mold for at least 15 minutes to set the liquid.
The best way to maintain the defined layers will be to bake between every layer that you pour. You can bake each layer for 15 minutes to set it. Then allow to cool before adding the next layer. If you choose to not bake between layers, the liquids may be slightly displaced by pouring the next layer onto it.
The best way to maintain the defined layers will be to bake between every layer that you pour. You can bake each layer for 15 minutes to set it. Then allow to cool before adding the next layer. If you choose to not bake between layers, the liquids may be slightly displaced by pouring the next layer onto it.

The next color I added was Navy Metallic.

Then another layer of Amethyst Pearl, a layer of Gold, and a layer of Navy Metallic.

To create the layers that have glitter in them, I poured a small amount of Clear LS into the bottom of a silicone cup and added lots of chunky glitter. I like to use the Purple Modeling Tools from Sculpey Bake Shop to stir liquids because they clean up so easily with paper towel. Make sure to stir the glitters in completely.

This photo shows a thick layer of the Clear glittery LS.

After the glitter layer I added a solid Clear layer, then more Amethyst Pearl, and Navy Metallic.

I continued filling in layers until I added the base layer of Amethyst Pearl which filled the mold to level.

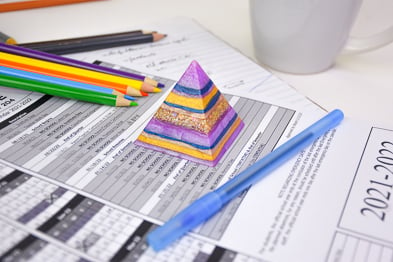
Here’s a look at the mold from the side showing all the layers. The final baking should be at least 30 minutes to make sure all the layers are fully cured.
Allow the mold to cool completely. To release the baked LS from the mold, open up a little gap between the clay and the mold. Drip one drop of Sculpey® Clay Softener & Thinner in the gap. Move the Thinner around the edges between the baked LS and the mold with the tip of the Needle Tool being careful not to puncture the mold with the tool. Then the pyramid should easily release from the mold. Wipe away excess Thinner from the pyramid with paper towel. If you need to clean the mold, this can easily be done with a cotton swab doused in rubbing alcohol.
