
Liquid Sculpey® Faux Druzy Earrings
Liquid Sculpey® Faux Druzy Earrings
Designed by Amy Koranek
Read More
A textured mold is the secret to making these faux druzy earrings. Amethyst Pearl and Translucent Turquoise complete the look.
TIME TO COMPLETE:
90 Minutes to make, bake twice, and assemble
Read Less
ADDITIONAL SUPPLIES
- Paper towel
- Crystal texture mold
- .75” x 1.25” Paper template
- Sharp craft scissors or a sharp craft knife
- Gold tone double connectors (4)
- Gold tone ear wires (2)
- Iridescent purple lentil shaped crystal charms (2)
- Bright gold metallic acrylic paint
- Paintbrush
- Flat nose pliers

Project Instructions
- Getting Started with Liquid Sculpey®:
- Baking:
- It is important to use oven thermometer when you bake the liquids so that you can ensure your oven is at the correct temperature.
- Do not microwave the liquids. They must be baked in a Preheated oven at 275 ºF (130 ºC) for liquid colors and 300 ºF (149 ºC) for Clear – Do not exceed baking temperatures.
- If your piece is less than 1/4” bake for 15 minutes. For thicker pieces that are 1/4” or above bake for 30 minutes.
- If your liquid project has become yellowed or discolored in the oven, when you remake it, tent it by placing either – folding an index card in half and placing your project under it by using aluminum foil over your project.
Here’s a tip for baking perfectly in silicone molds. Dampen a dish towel with water and wring out as much of the water as you can. Fold the damp towel so that the molds can sit level on top of it. The damp towel will slow down the curing process so that the LS will cure evenly throughout and avoid warping.
With the popularity of silicone molds used for Liquid Sculpey®, resin pouring, candy making, and fondant shaping, the possibilities are endless. In this tutorial I am using a mold that has the sharp look of crystal. This particular mold is also polished - meaning the surface of the mold itself is shiny. This shiny surface will transfer to the Liquid Sculpey® during baking. We will pour Liquid Sculpey® (LS) in a thin layer over the crystal mold and then mount it after baking to Sculpey Premo™ to make it sturdy.
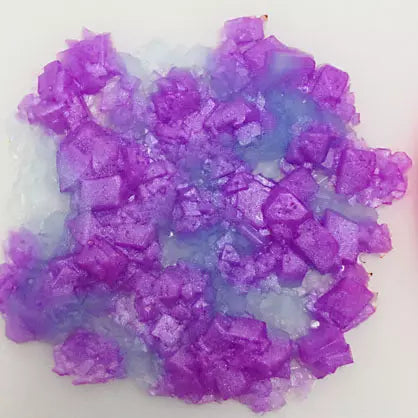
Here’s a look at what the mold looks like that I am using to make the look of druzy crystal. Molds like these are readily available online and as long as they are silicone, they are fair game for baking with LS.
Here’s a look at what the mold looks like that I am using to make the look of druzy crystal. Molds like these are readily available online and as long as they are silicone, they are fair game for baking with LS.

Fill some of the deepest areas with Amethyst Pearl LS leaving gaps randomly.

Fill the gaps with Translucent Turquoise LS.

You can make the overall crystal thicker by backfilling Amethyst Pearl on top of itself, and Translucent Turquoise on top of itself. Gently tap the mold on your work surface to release air bubbles. Stubborn air bubbles can be popped with the Needle Tool.

Bake the mold following the baking instructions for Liquid Sculpey®. When it comes out of the oven the colors will be much deeper.

Carefully peel the molded piece away from the silicone mold.
Cut out two 1” x .75” rectangles of the molded druzy using sharp craft scissors or a sharp craft knife. Save the remainder of the molded druzy for other projects. This can easily be done by making a small paper template to help guide your cuts.

Roll conditioned Silver Premo™ to a sheet 1/8” thick and 1.25” wide.

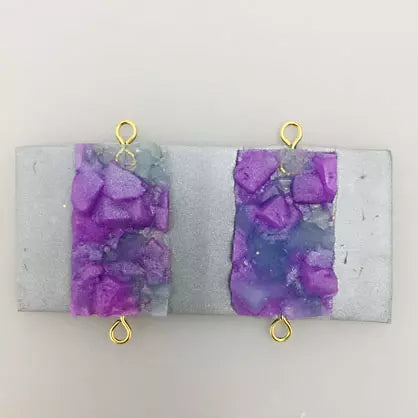
Position the double connectors as shown with an eye sticking out along the edge and one eye embedded in the Silver Premo™. Each set of two double connectors should be directly opposite each other.

Sandwich a druzy rectangle, one over each of the pairs of connectors. Apply pressure to the druzy pieces so that they are touching the Silver Premo™ securely. Baked LS likes to adhere to raw Premo™, so they will bond together permanently during the next baking.
Bake the rectangles again following the baking instructions for Sculpey Premo™.

Allow the clay rectangles to cool completely. Paint the edges of the clay rectangles with bright gold metallic acrylic paint. Allow the paint to dry completely.

Here is the layout for the earring assembly. We won’t need any jump rings because the loop in the ear wire and the crystal charms will be the correct orientation for attaching to the double connectors.

Assemble the earrings using flat nose pliers to open and close the loops.

- Choosing a selection results in a full page refresh.
- Opens in a new window.