
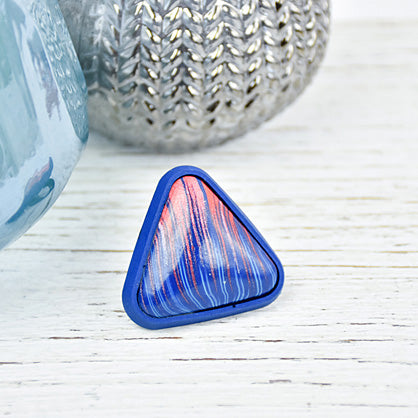
Premo Sculpey® Tri-Colored Triangle Ring
Premo Sculpey® Tri-Colored Triangle Ring
Designed by Amy Koranek
Read More
Read Less
This gorgeous ring looks so complex, but its amazingly simple to create using the Sculpey Tools™ cabochon and bezel molds and a clever color stacking trick.
ADDITIONAL SUPPLIES
- Paper mini cupcake liner
- Ring finding
Project Instructions
- Getting Started:
Start with clean hands, unwrap and knead clay until soft and smooth, or condition by running clay though a Pasta Machine. We recommend using a designated machine for clay purposes only. When working with multiple colors, clean hands with soap and water or baby wipes (we have found that baby wipes work best) before switching colors. Shape clay, pressing pieces firmly together. Wash hands after use.
- Baking:
Roll 1/4 bar of each Premo color into a log. Press the logs side by side and sheet through the Clay Conditioning Machine on the thickest setting.

Fold the sheet of colors matching like color to like color but just slightly crooked so that when the colors go through the machine they will be slightly askew. Press through the Clay Conditioning Machine fold first.

Keep folding and pressing through the Clay Conditioning Machine a few more times until you notice the colors blending. When you cut across the colors, you should see an Ikat or zig zag pattern of the colors.

Cut 1/4 inch strips from the little blended sheet. Stack the strips up so that the stripe pattern is now facing you.

Take two 1/8” thick slices from the little stack. Lay them side by side. Carefully roll over them with the Acrylic Clay Roller to seal the seam together.

Lay the little sheet next to the Large Triangle in the Cabochon mold to see how the colors are going to land in the shape.

Cut a triangle shape out of the little shape but make sure it is larger than the Cabochon area.

Firmly press the shape into the cabochon.

Keep moving the clay to fill up the shape. Shave excess clay away from the back or add a scrap of clay if the shape is not full.

Bake the Cabochon mold following the direction for Premo. When the mold is completely cool gently flex it to remove the piece.

Pour Blue Liquid Sculpey® (LS) into the bottom of a paper baking liner. You only need enough to fill the Large Triangle Bezel. Add a drop of Black LS to the Blue LS and stir completely. Preheat the oven to 275 degrees F and place the mold inside. Remove the heated mold from the oven and allow it to cool for 2 minutes. Carefully touch the mold with your hand. If you can touch the mold comfortably with your hand and feel that it is still quite warm, it is ready to fill. Pour the Liquid Sculpey® into the mold but don’t overfill. Tap the filled mold on a flat smooth surface to release air bubbles. Place the filled silicone mold in the preheated oven and cure for 20 minutes.

When the mold is completely cool position the ring finding in the center of the back. Use a twisted scrap of the striped clay to make a little rope. Secure the finding to the LS back with a little LS and then place the rope around the edge to hold it securely in place. Bake again following the baking instructions for Premo.

Use a bit of the tinted LS to glue the cabochon shape into the bezel and bake one more time following the baking instructions for Premo
