
Sculpey Soufflé™ Woven Coaster
Sculpey Soufflé™ Woven Coaster
Designed by Amy Koranek
Read More
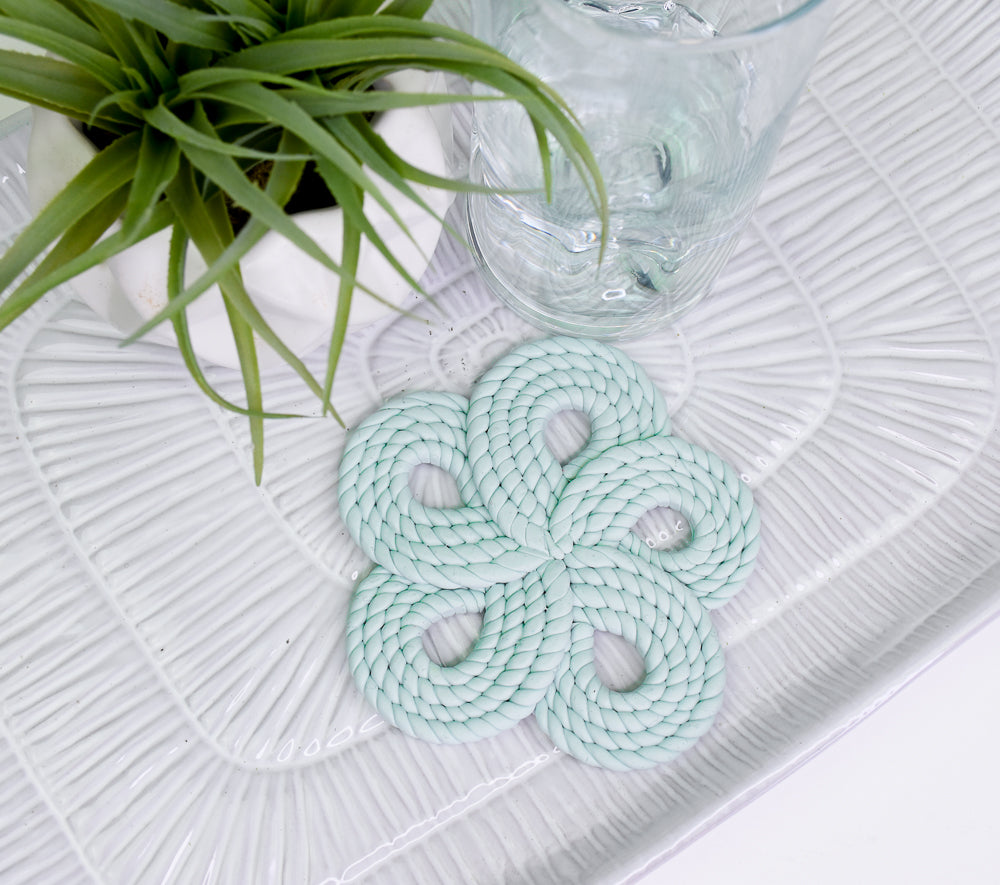
These coasters look so incredibly intricate, but designer Amy Koranek breaks down the process and the Sculpey Soufflé™ Glacier brings the drama! I would love one of these propped up in my book case to show off!
NOTE FROM ARTIST: I used every single bit of one bar to create one coaster. If you would like to make more than one coaster, you will need more than one bar.COMPLETION TIME: 90 Minutes to make and bake
Read Less
NOTE FROM ARTIST: I used every single bit of one bar to create one coaster. If you would like to make more than one coaster, you will need more than one bar.COMPLETION TIME: 90 Minutes to make and bake
ADDITIONAL SUPPLIES
- Optional - felt or cork for the bottom
- Optional - silicone glue
Project Instructions
- Getting Started:
Start with clean hands, unwrap and knead clay until soft and smooth, or condition by running clay though a Pasta Machine. We recommend using a designated machine for clay purposes only. When working with multiple colors, clean hands with soap and water or baby wipes (we have found that baby wipes work best) before switching colors. Shape clay, pressing pieces firmly together. Wash hands after use.
- Baking (also called Curing):
To make the rope rolling more manageable, I just conditioned and rolled a rope from 1/4 bar at a time. Take 1/4 bar and roll it to a rope that is 1/8” thick. This will be about 36” in length. Once you have the 1/4 bar rolled, fold the 36” rope in half and gently pinch it together forming a double strand 18” long.

Carefully twist the double strand so that it looks like a rope.

Cut off a 4.5” length and bend it gently as shown.

Layer three more strands of the clay rope along the outside of the initial piece. The amount shown across the bottom is what I had left over from this first rope. That will be a good starting amount for the next arch.

We need to repeat Steps 2-5 three more times to get a total of five arches. There is enough left over each time the rope is made from a 1/4 block volume to get the fifth arch.

Bend each arch into a petal shape as shown making sure the beginning of the arch is well connected to the end of the arch.

Use the Clay Blade to trim away all but the outside tab of the arch as shown.

Pinch the tabs as you assemble the flower shape so that the tabs will not be so thick as they pile up. Lay the second petal over the first slightly overlapping the tabs and the sides of the petals.

Add a third petal. Always pinch the tab a little flat before layering it over the other tabs.

Add the fourth petal.

After adding the fifth petal, overlap the first petal over the fifth to make the pattern consistent all the way around. Apply gentle pressure to each petal so that they connect to each other at the overlapping points.

Select two circle cutters that match both the outside diameter of the petals and the inside diameters.

Roll all the remaining scraps of Glacier to a thin sheet and cut out circles using the larger circle. Remove the center of each circle with the smaller circle. Cut the circles in half with the Clay Blade. These thin half circles will be used to prop up the lower areas of the petals from the back side so that the coaster lays more flat and evenly from the top

Flip the coaster over and gently press the flat half circles to the back of the petals in the low spots. Trim the half circles as needed.

Flip the coaster right side up. Check for high and low areas that might need adjusted. Bake following the baking instructions for Sculpey Soufflé™.

Allow to cool completely before use. If you would like to add felt or cork to the bottom of your coaster you can glue that on with silicone glue. This step is not necessary, but can be added if you like

- Choosing a selection results in a full page refresh.
- Opens in a new window.