
Sculpey Premo™ Stenciled Shoulder Duster Earrings
Sculpey Premo™ Stenciled Shoulder Duster Earrings
Designed by syndee holt
Read More
Sculpey teamed up with Stencil Girl to create an easy and incredibly dynamic pair of earrings. And there is a clever tip for using the scrap pieces!
TIME TO COMPLETION: 60 minutes including baking and assembling
Read Less
ADDITIONAL SUPPLIES
- Stencil Girl stencil (mine is ATC Mixup Silveri)
- Gold and Copper acrylic paints (mine are Jacquard Lumiere)
- Small foam craft daubers (available in craft sections), small paint brush to apply paint to dauber
- Ribbon crimps in at least 5/8 inch (16 mm) in color of your choice – gold, antique gold and antique copper all work with this design!
- Pair of matching ear wires and (2) small jump rings. NOTE: Oval jump rings work best for these
- Flat-nosed pliers – I prefer the plastic-coated pliers so that my metal doesn’t get marred
- SUGGESTED! Cascade dishwashing gel to clean your stencils (soak and scrub)
- SUGGESTED! Small piece of graphing paper – mine is an index card type
- SUGGESTED! Small amount of Sculpey Premo™ Bronze or other selected color for scrap project
Project Instructions
- Getting Started:
Start with clean hands, unwrap and knead clay until soft and smooth, or condition by running clay though a Pasta Machine. We recommend using a designated machine for clay purposes only. When working with multiple colors, clean hands with soap and water or baby wipes (we have found that baby wipes work best) before switching colors. Shape clay, pressing pieces firmly together. Wash hands after use.
- Baking:
Position your selected stencil on a sheet of conditioned Peacock Pearl that is rolled out on a medium setting on a pasta machine or about 1/16 inch (2 mm).
Lightly rub your finger across the entire stencil and you will see the air bubbles disappearing.
Use a small craft brush to apply the Copper and Gold paint to individual daubers as shown.
Lightly rub your finger across the entire stencil and you will see the air bubbles disappearing.
Use a small craft brush to apply the Copper and Gold paint to individual daubers as shown.

Daub away! I actually use both hands for this with one color in each hand.
You will most likely need to reload paint onto your daubers until the entire stencil is covered. (Unless you only want to use a small portion of the stencil).
Place the stencil in a tub or bowl of clean water. (NOTE: Cascade dishwashing gel is often recommended to help remove all the excess paint)
You will most likely need to reload paint onto your daubers until the entire stencil is covered. (Unless you only want to use a small portion of the stencil).
Place the stencil in a tub or bowl of clean water. (NOTE: Cascade dishwashing gel is often recommended to help remove all the excess paint)

I pondered my ribbon crimp shape and color choices while the paint dried. They ALL would work really well!

Trim the stencil top and bottom to the edge of the stenciled pattern.
I cut my rectangles using the guidelines of the graphing paper and cut them just slightly wider than my ribbon crimps.
I cut my rectangles using the guidelines of the graphing paper and cut them just slightly wider than my ribbon crimps.

Lastly, I decide on my final length and trim the bottom using the graphing paper as a guide.
Place the clay pieces on the Sculpey Clay Mat and place the mat on an oven bakeable flat surface. Bake according to the directions above.
Place the clay pieces on the Sculpey Clay Mat and place the mat on an oven bakeable flat surface. Bake according to the directions above.

I like to round the edges of my rectangles, so I use my clay blade to just “nip” off the sharp corners

Once I have all the corners cut off, I use the back of my thumbnail to gently smooth the sharp edges into a soft curve.
You can see in the second photo how the edges no longer look raw and sharp! The rounded corners give a more finished look if your ribbon crimps are shorter than the clay.
Place the clay pieces on the Sculpey Clay Mat and place the mat on an oven bakeable flat surface. Bake according to the directions above.

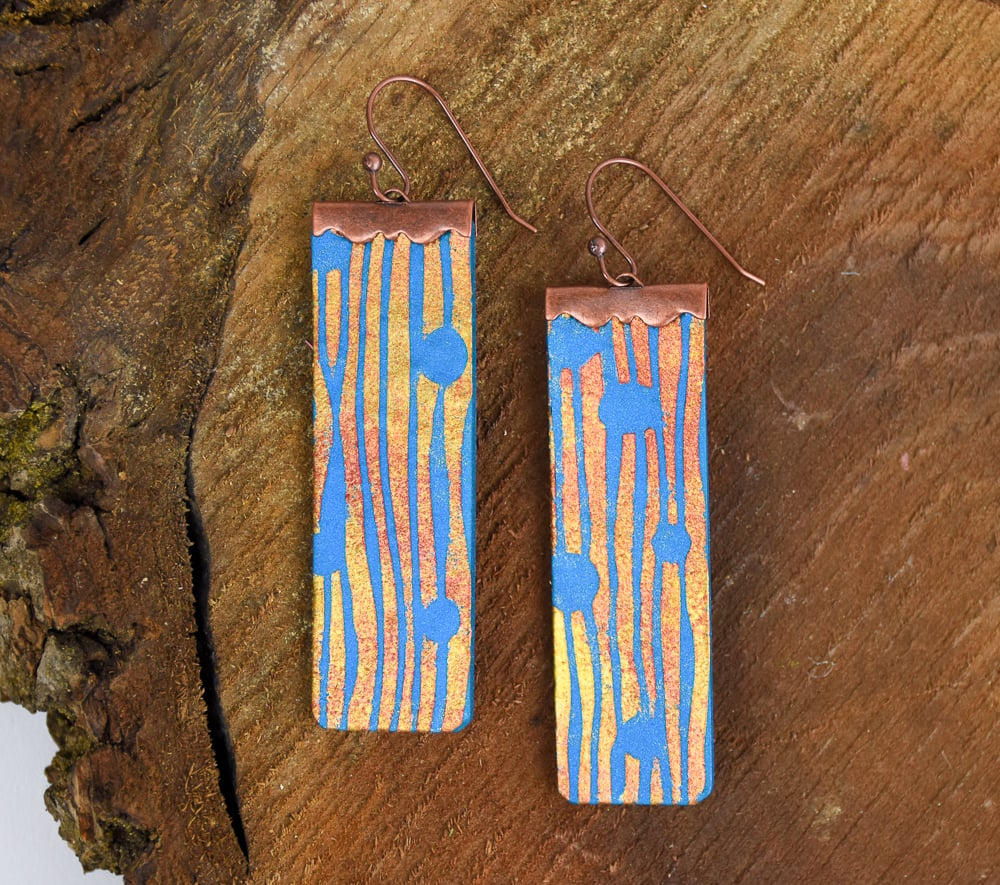
Once the clay is baked and cooled, we can add the selected ribbon crimps (I FINALLY settled on these fancy antique copper ones!) Use your pliers to first gently crimp the metal in place. Check your centering and THEN use the pliers to do the final crimp. NOTE: I prefer to use plastic coated pliers for ribbon crimps so that I don’t mar the finish of the crimps.

Just add your jump ring and ear wires to complete the earrings! NOTE: The ribbon crimp bail is very thin metal, so I prefer to use oval jump rings where the opening is on the side so that the jump ring can’t slide out of the ribbon crimp bail easily. Or do like I did and use an ear wire that just slides through the crimp bail!

Got leftover stenciled scraps? Why not cut them into small pieces and collage them onto a sheet of contrasting color clay (I used Premo Bronze because I had used all my Premo Copper AS USUAL). Be sure to leave a little space between each piece.

Place a sheet of clean paper over the top and gently rub with a smooth water glass to press the pieces into the clay sheet.

Now just trim your shapes or use your favorite small cutters to cut out some more earrings or pendants! I’m using my favorite Sculpey Irregular Triangle cutter. (I flip the sheet over to cut out the mirror image).
Place your holes for jump rings, bake (according to the directions above) and assemble!
Place your holes for jump rings, bake (according to the directions above) and assemble!
