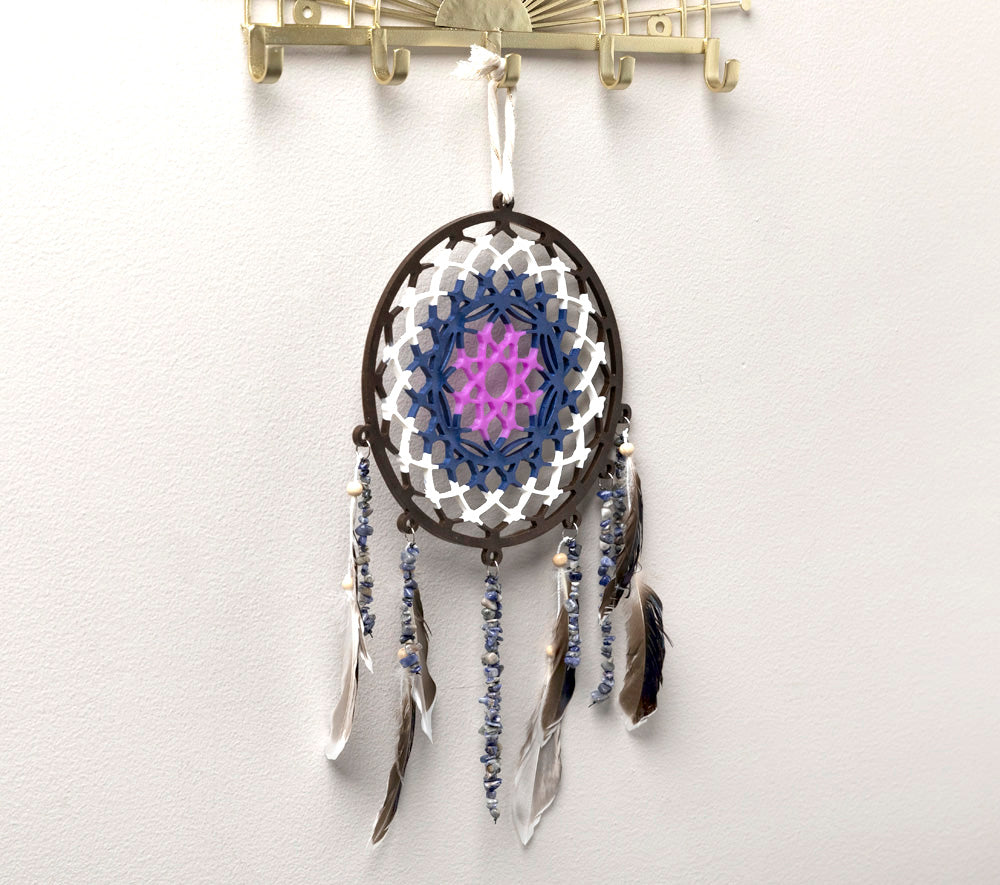

Liquid Sculpey® Dreamcatcher Wall Hanging
Liquid Sculpey® Dreamcatcher Wall Hanging
Designed by Amy Koranek
Read More
Make and bake this really cool dreamcatcher. You can finish it with your favorite beads and feathers to make it your own special design.
TIME TO COMPLETE:
2 Hours to make, bake, and assemble
Read Less
ADDITIONAL SUPPLIES
- Paper towel
- Silicone DreamCatcher mold (mine is from Amazon-search "Silicone DreamCatcher mold"
- Feathers (8) glued to bead cord
- Natural stone beads in coordinating colors - the ones shown in this tutorial are lapis
- Natural wood beads (8)
- Clear monofilament
- Scissors
- Ruler
- 10 mm Silver tone jump rings (7)
- 12” Yarn in coordinating style
- Instant drying glue
- Flat nose pliers

Project Instructions
- Getting Started with Liquid Sculpey®:
-
Baking:
- -It is important to use oven thermometer when you bake the liquids so that you can ensure your oven is at the correct temperature.
- -Do not microwave the liquids. They must be baked in a Preheated oven at 275 ºF (130 ºC) for liquid colors and 300 ºF (149 ºC) for Clear – Do not exceed baking temperatures.
- -If your piece is less than 1/4” bake for 15 minutes. For thicker pieces that are 1/4” or above bake for 30 minutes.
- -If your liquid project has become yellowed or discolored in the oven, when you remake it, tent it by placing either – folding an index card in half and placing your project under it by using aluminum foil over your project.
Here’s a tip for baking perfectly in silicone molds. Dampen a dish towel with water and wring out as much of the water as you can. Fold the damp towel so that the molds can sit level on top of it. The damp towel will slow down the curing process so that the LS will cure evenly throughout and avoid warping.
Lay the mold flat on your work surface. We will work to fill the mold in a color blocking fashion, marking each area of color with boundaries before filling completely.
Start first with the center area, half filling each well with Amethyst Pearl Liquid Sculpey® (LS).
Start first with the center area, half filling each well with Amethyst Pearl Liquid Sculpey® (LS).

Move out to the next round half filling the large areas with Navy Metallic LS. If we fill each of the largest areas first, then the intermediate areas in between colors can be free to mix a bit.

Move out to the next circle and fill the largest areas halfway with White LS.

I went back to the Navy Metallic circle and filled in another area of large wells halfway with more Navy Metallic LS.

Fill large areas halfway on the very outer ring with Brown Metallic. For now, we don’t worry about filling the mold full, we just color block select areas with each color to set boundaries for that color

Fill the outermost ring halfway with more Brown Metallic.

Now, go back and fill all the areas all the way to level matching color on top of color. Tap the mold several times between fillings so that the LS can spread from one area to the next and to release air bubbles. Add liquids as needed placing like color on top of like color until filled.

Bake the mold following the baking instructions for Liquid Sculpey®.
Allow to cool completely before flexing to release the dreamcatcher.
Allow to cool completely before flexing to release the dreamcatcher.

Flip the dreamcatcher over so the right side is facing up.
Next we will make the hanging elements.
Next we will make the hanging elements.

Start with the center dangle. String a 4”, a 5”, and a 6” set of stone beaded strands on monofilament.
Tie each of the strands to one jump ring.
Tie each of the strands to one jump ring.

Seal each knot with instant drying glue.

Make several more strands on jump rings with the stone beads.
For my sample I made a total of six strands ranging in length from 4”-6” and gluing the knots on each one.
For my sample I made a total of six strands ranging in length from 4”-6” and gluing the knots on each one.

Next, I tied feathers strung on white cord with wooden beads. The feathers shown here were already strung on the cord with the beads. You can make your own by instant gluing feathers to cords, stringing on wooden beads and then tying them to the jump rings alongside the beaded strands.
Using instant drying glue to secure the knots at each jump ring keeps them from coming untied. Just be sure you don’t glue the jump rings closed.
Using instant drying glue to secure the knots at each jump ring keeps them from coming untied. Just be sure you don’t glue the jump rings closed.

Use flat nose pliers to open and close the jump rings attaching the elements to the loops from the molded dreamcatcher.

When you are happy with the design, trim the excess tails from the feathers and stone beads with scissors.

Attach yarn to the loop at the top and your finished dreamcatcher is ready to hang.

- Choosing a selection results in a full page refresh.
- Opens in a new window.