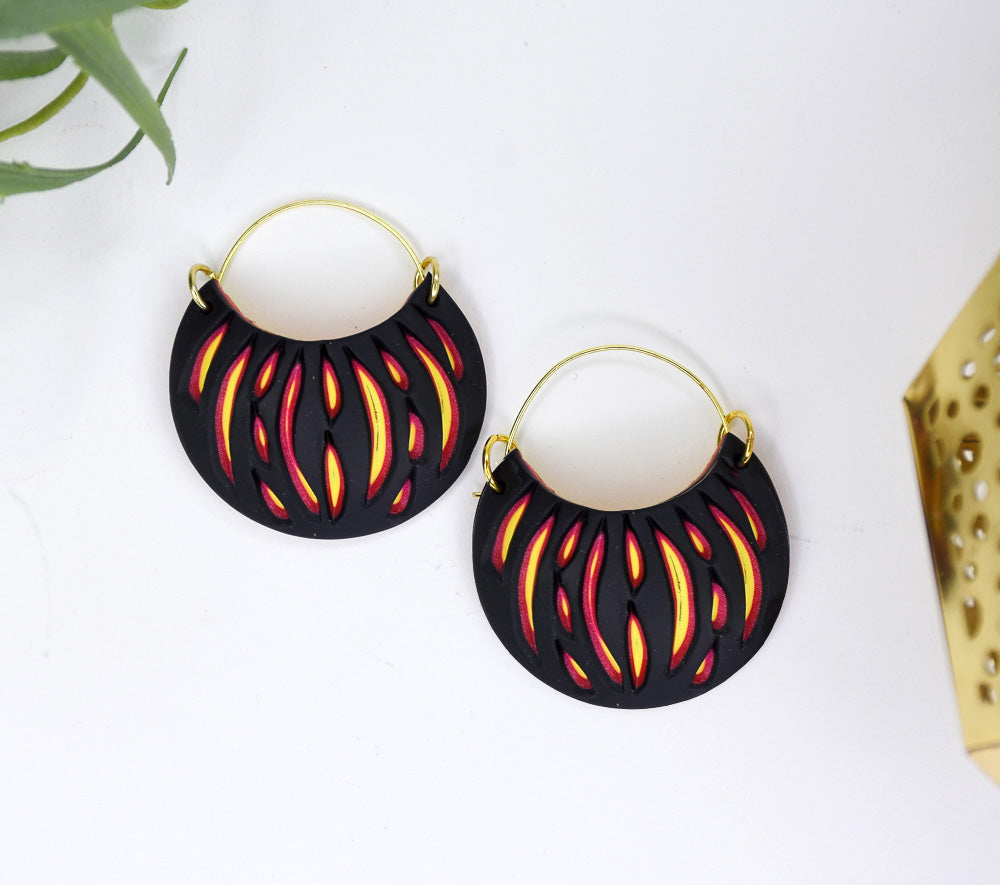
Sculpey Premo™ Flame Earrings with Diamond Core Tools
Sculpey Premo™ Flame Earrings with Diamond Core Tools
Designed by Amy Koranek
Read More
Mimic the look of carved flames in these striking earrings using Premo™ Sculpey® and DiamondCore® Tools.
COMPLETION TIME:
60 Minutes to make, bake, and assemble
Read Less
ADDITIONAL SUPPLIES
- DiamondCore® Tools Curved V Tip P1
- DiamondCore® Tools Curved Square P5
- Glass or metal small dish for baking curved shapes - Optional
- 8 mm Gold tone jump rings (4)
- Gold tone ear wires (2)
- Flat nose pliers

Project Instructions
- Getting Started:
Start with clean hands, unwrap and knead clay until soft and smooth, or condition by running clay though a Pasta Machine. We recommend using a designated machine for clay purposes only. When working with multiple colors, clean hands with soap and water or baby wipes (we have found that baby wipes work best) before switching colors. Shape clay, pressing pieces firmly together. Wash hands after use.
- Baking (also called Curing):
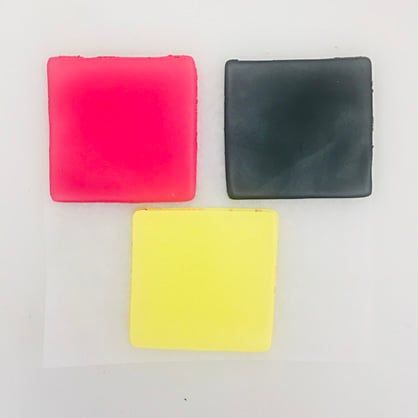
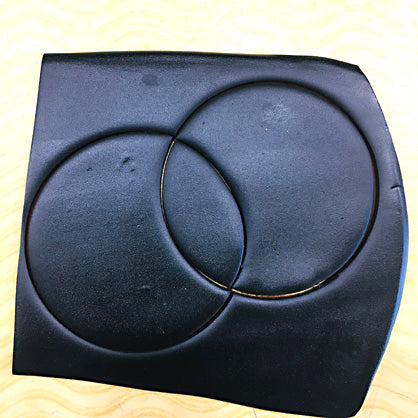
The measurements given here are based on 1-ounce bars of Premo™ from the 24 Piece Premo™ Multipack. From 1/2 bar of each Black, Pomegranate, and Sunshine, produce small equal size sheets about 1/8” thick using the Acrylic Clay Roller. The squares shown here are approximately 2” X 2”. The important thing is to have equal sized and equal thickness pieces of each color.
Stack the colors as shown.
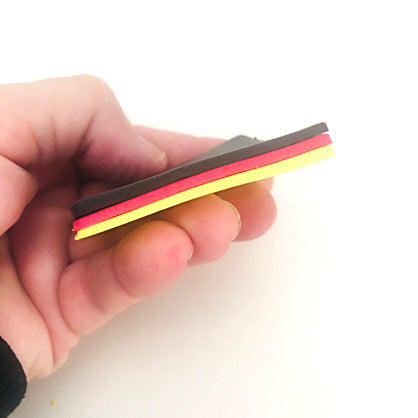
Roll over the stack of colors with the Acrylic Clay Roller until the stacked sheet is not more than 1/8” thick.
Finally, burnish the stacked sheet onto your work surface with the Acrylic Clay Roller so that it sticks to the work surface. Having the clay stuck down will make carving the sheet with the carving tools much easier because the clay will not move around as you carve.
Using the 1.75” circle cutter, cut out two overlapping circles to produce two fat crescents. If you overlap the cuts as shown, each partial circle will be the same size. Leave the clay attached to your work surface and leave the scraps as well to help keep everything in constant position.
Using the 1.75” circle cutter, cut out two overlapping circles to produce two fat crescents. If you overlap the cuts as shown, each partial circle will be the same size. Leave the clay attached to your work surface and leave the scraps as well to help keep everything in constant position.
Next let’s take a look at the DiamondCore® Tools.
This project is based on a set of three different shaped blades that came in the 3 Piece Starter’s Carving Set. The handles are labeled P1, P2, and P5.
It’s also important to note that this is the orientation in which the handle should be held for optimum use. I am right-handed, so the number designation would be facing me as I held the handle between my thumb and fingers in my right hand. It’s really important to cut with the proper side of the cutting blade.
The blades are ultra thin and it’s possible to cut through raw polymer clay with either side. But to get really clean cuts, you want to make sure you are using the proper side of the blade.
I suggest testing the cuts through scrap clay before approaching what will be your finished design.
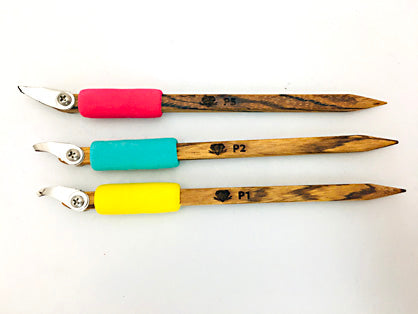
Here’s a look at the different shapes of the blades. For this project I focused on the bottom (yellow) blade which is the Curved V, and the top (pink) blade which is the Curved Square. When using the Curved Square, I held the blade at an angle so that I was only carving into the fresh clay with the corner of the blade for better detail.
Also note, that each end of the handle has a tapered point which is perfect for poking holes in raw clay for adding findings.
Also note, that each end of the handle has a tapered point which is perfect for poking holes in raw clay for adding findings.
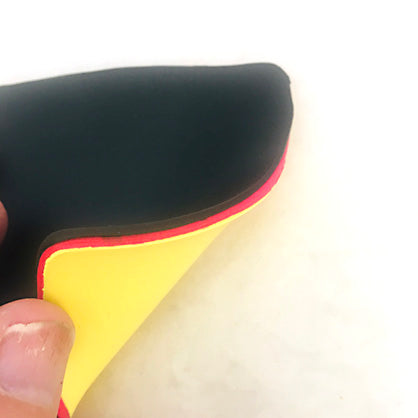
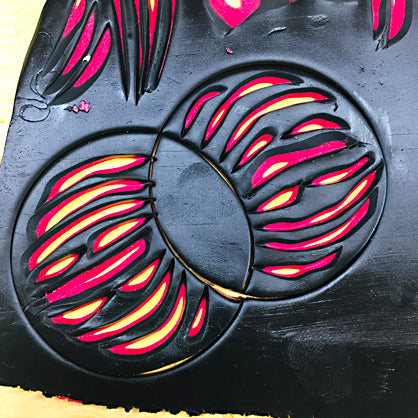
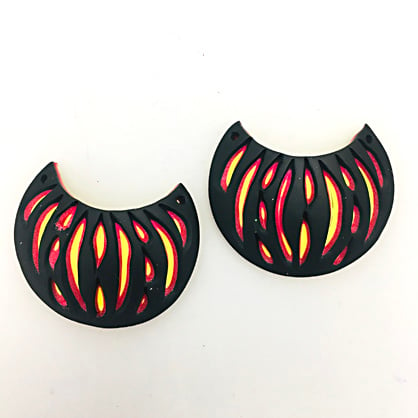
Here’s a look at the carving that I did in the fat crescents. I started in the center of each crescent and worked to the right and then to the left. I always started cutting at the top of each stroke, and pulled down making the cut more and more shallow until I lifted the blade out at the bottom.
For each stroke, I inserted P5 at the top, holding it at an angle so that only the corner of the blade was cutting. Then carefully pulled the cutting blade through the clay.
If I had strokes that were not deep enough to show all three colors, I went back into the same cut with P1 making the cuts slightly deeper.
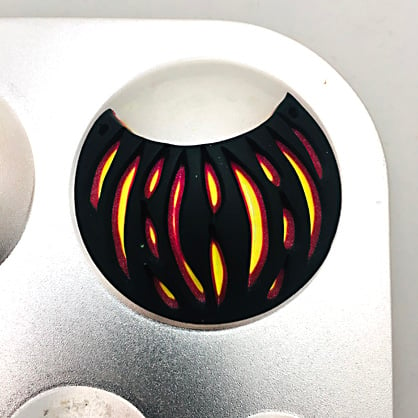
When the cutting was complete, I carefully lifted each crescent from the work surface with a Clay Blade and gently applied them to the largest domes on my Hollow Bead Maker. If you don’t have a Hollow Bead Maker, you could drape the crescents over the side of a metal or glass dish to make them curved while baking.
Once they are curved into place, poke a hole in each of the points of the crescent with the pointed tip of your carving tool so you can assemble them into earrings after baking.
Once they are curved into place, poke a hole in each of the points of the crescent with the pointed tip of your carving tool so you can assemble them into earrings after baking.
Bake on the curved shape following the baking instructions for Sculpey Premo™. Allow to cool completely before removing from the curved form.
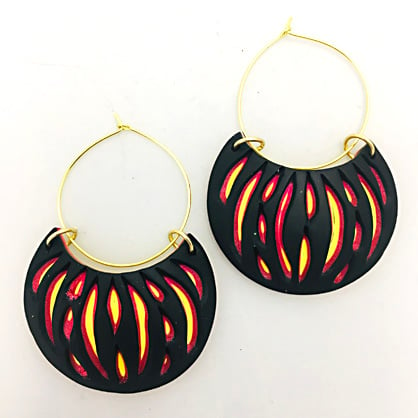
Here’s the layout for the earrings. You will need two 8 mm jump rings for each earring and simple wire hoops. To make a left earring and a right earring, make sure that the hoops are laid out in opposite directions.
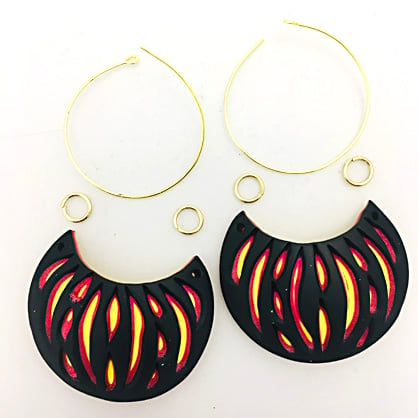
Use flat nose pliers to open and close the jump rings inserting them into the holes in the clay pieces.
String the wires through the jump rings making sure the loops in the wires are going opposite directions.
If you like, you can bend an angle in the end of each wire to help them hold more securely through the loops.
String the wires through the jump rings making sure the loops in the wires are going opposite directions.
If you like, you can bend an angle in the end of each wire to help them hold more securely through the loops.
- Choosing a selection results in a full page refresh.
- Opens in a new window.