
Sculpey Premo™ Mokume Gane Coasters
Sculpey Premo™ Mokume Gane Coasters
Read More
Even decorative coasters can make a big difference when trying to update a room. Give this simple technique a try and you'll be amazed with the results.
Read Less
ADDITIONAL SUPPLIES
- Spray Bottle with Water
- Craft Knife 3.25”
- 3" Round Cutter
- Clear Heavy Duty Glue (E6000)
- Gold Mica Powder
- Cork
- Bristle Block
Project Instructions
- Getting Started:
Start with clean hands, unwrap and knead clay until soft and smooth, or condition by running clay though a Pasta Machine. We recommend using a designated machine for clay purposes only. When working with multiple colors, clean hands with soap and water or baby wipes (we have found that baby wipes work best) before switching colors. Shape clay, pressing pieces firmly together. Wash hands after use.
- Baking:
With the Clay Conditioning Machine on the #2 setting, roll each color of clay (about 1/2 package each) into a sheet. Pair the colors up (usually a light and a dark works best) and run each pair of colors through the Clay Conditioning Machine on the #2 setting. Now put the two pairs together and run through the Clay Conditioning machine on the #2 setting.
Cut the long sheet and half and stack the two halves avoiding air bubbles by using the Acrylic roller to make sure the layers are stuck together well. Cut the stack in half again and restack avoiding air bubbles. This stack is referred to as the mokume gane stack.

Mist the Design Block pattern of your choice with water. Press the block into the stack using a firm pressure. Remove the block. Continue to pattern the clay with the same pattern or switch it up to create your own design.
With the Super Sculpey flexible blade remove thin sheets of the mokume gane stack.

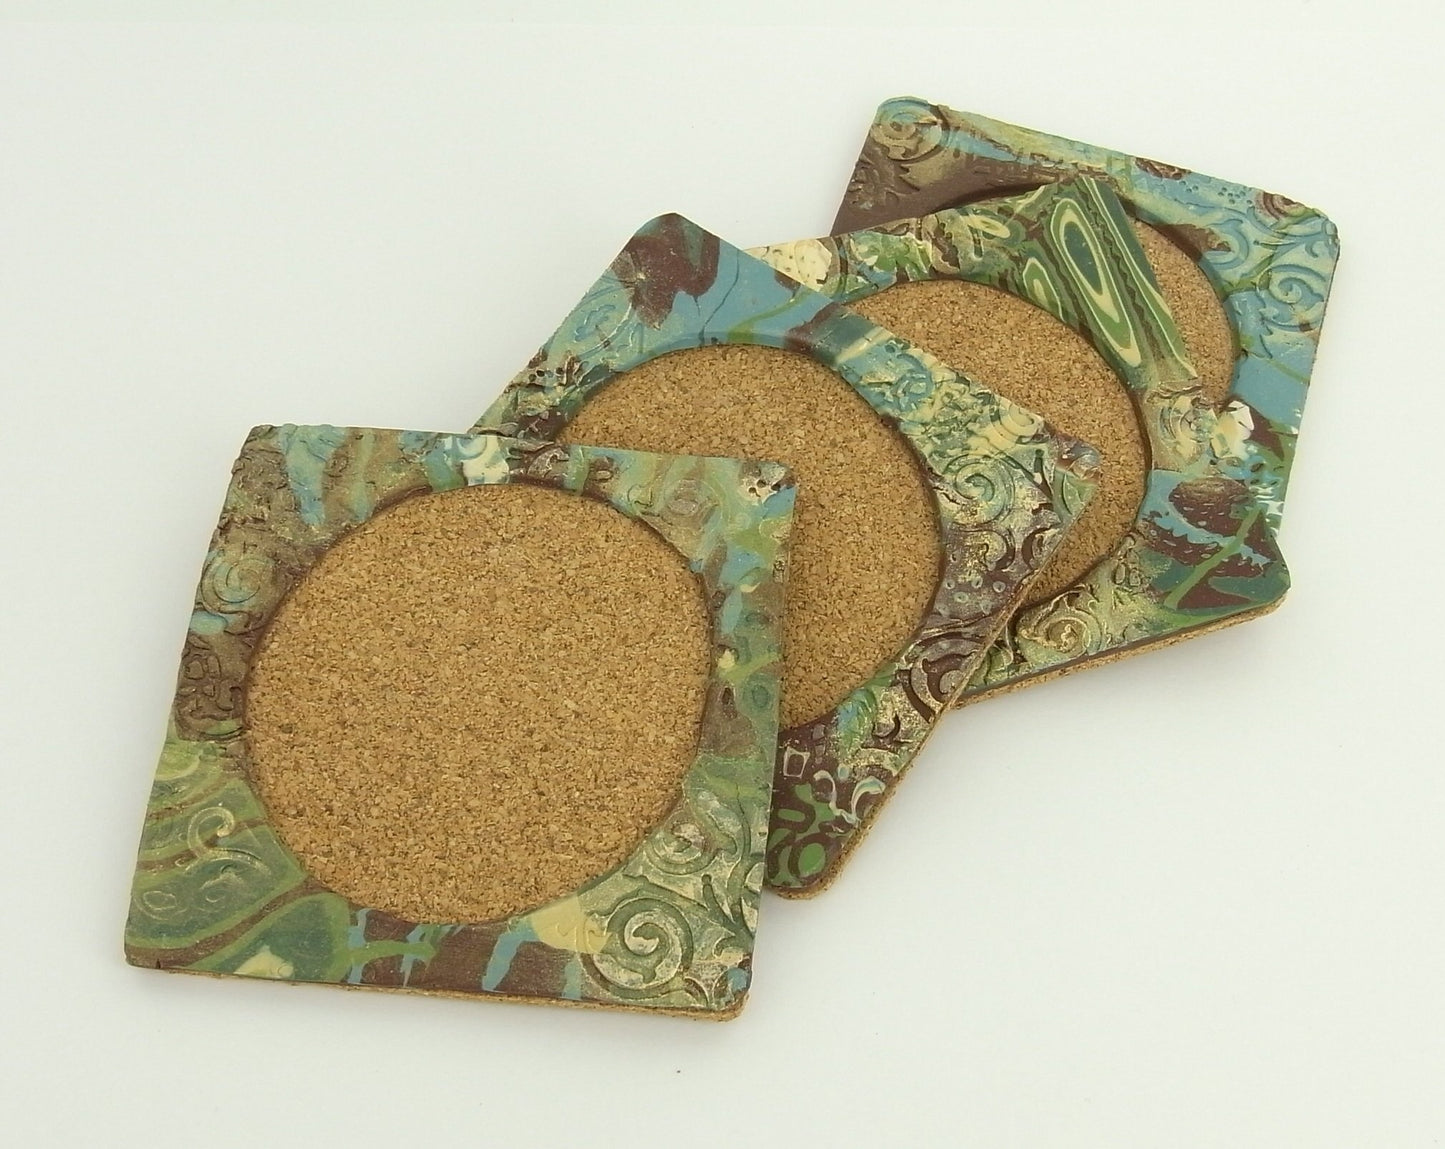
Roll out the other half of Burnt Umber along with one full bar of Burnt Umber through the Clay Conditioning Machine. Once conditioned roll out a sheet about 1/8” thick. Depending on the size of your cork coasters, cut the clay to fit. The coaster pictured is about 4” x 4”. Use the circle cutter to cut a hole in the center of the clay. Lay the mokume gane slices on the clay base until the all of the Burnt Umber is covered. Lightly press the Edgy Texture Sheet into the clay randomly around the piece. Smooth any rough edges with your finger. To highlight the texture, lightly brush the Gold Mica Powder on the clay surface.

Bake the clay coasters according to the above directions. Allow the pieces to cool completely before you adhere them to the cork.