
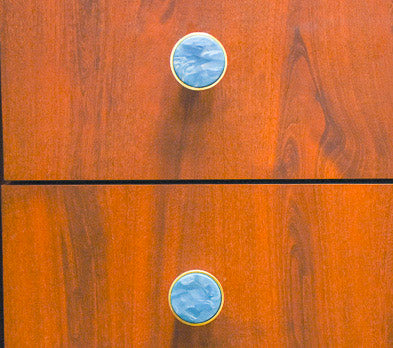
Sculpey Soufflé™ Seawater Sparkle Drawer Knobs
Sculpey Soufflé™ Seawater Sparkle Drawer Knobs
Designed by syndee holt
Read More
Read Less
These gorgeous knobs were easily created with a combination of Sculpey clays and some brass knobs. You can change the look of that old drawer in an afternoon!
TIME FOR COMPLETION:60 minutes make and bake
ADDITIONAL SUPPLIES
- Couple of small sheets of plain paper - I use Patty Paper
- Metal (or wood) knobs that have an area to mount the clay in (these are from Target!)
- Pointed craft blade
- Clear instant glue
Project Instructions
- Getting Started:
Start with clean hands, unwrap and knead clay until soft and smooth, or condition by running clay though a Pasta Machine. We recommend using a designated machine for clay purposes only. When working with multiple colors, clean hands with soap and water or baby wipes (we have found that baby wipes work best) before switching colors. Shape clay, pressing pieces firmly together. Wash hands after use.
- Baking:
Roll out one each of the marked sections of each color of clay (about 1/3 of the block) and condition according to the directions in step one. Roll each clay into a snake that is about 4 inches long by 3/8 inch diameter and twist the snakes together as shown. Twist until the stripes are vertical.

Flatten the twist with your fingers and the acrylic roller, keeping the stripes as vertical as possible. The clay should be just a little wider than the widest setting on the Clay Conditioning Machine.

Run the twist through the Clay Conditioning Machine on the widest setting, taking care to keep the stripes as vertical as possible.

Fold the clay in half from the bottom to the top (keep the stripes vertical) and roll through the machine again with the fold first. You want to keep the stripes kind of matched, but a little off-center too to allow for some blending. You can see in the photo how the colors are creating some beautiful blended areas as well.

Repeat step 5. Now we can really see some nice blending happening! Cut the blended clay in half vertically now, and set aside one piece of the clay.

I cut my strip up into matchsticks (cutting horizontally across the stripes). The width of the cut pieces doesn’t have to exactly match. Then I laid the pieces onto a thinner sheet of Sea Glass to add more the of the Sea Glass color into the mix.

Put the strips of clay onto a small sheet of paper (Patty Paper) Now chop those matchsticks up into smaller pieces. Again, they do not have to be exactly the same. Once you have them chopped up, smoosh them together as shown.

Use the acrylic roller to first, press down the stack and then to smooth the stack out.

Now you can carefully run the sheet of clay through the Clay Conditioning Machine on the widest setting. The widest setting was a perfect thickness for my inset area of my knobs, so I didn’t need to make the layers any thinner. IF you need to make yours thinner for your hardware, go down one setting at a time on the Clay Conditioning Machine.

Hopefully one of the circle cutters will be a perfect size for your knob like mine were! Cut out two pieces if you can before you repeat steps 6-10 above with the piece of clay that you had set aside in Step 5.

Here are the four pieces that I cut out of the two pieces that I started with. You can also press the scrap together and reroll them and cut more pieces as well!

This is one of my favorite tips – Use a clay blade to gently trim the back at an angle. This will create a slightly smaller back than the front, so that the clay will easily slip into the bezel of the knob, but perfectly fill the top.

Flip the knob over and press gently against a sheet of clean paper. Slide your clay blade along the top edge of the bezel to remove any excess clay and bake according to the directions in Step 1 above. After the clay has baked and cooled, pop it out of the knob and glue it back into place.

- Choosing a selection results in a full page refresh.
- Opens in a new window.