
Sculpey III® Galaxy Ring Dish
Sculpey III® Galaxy Ring Dish
Designed by Amy Koranek
Read More
Read Less
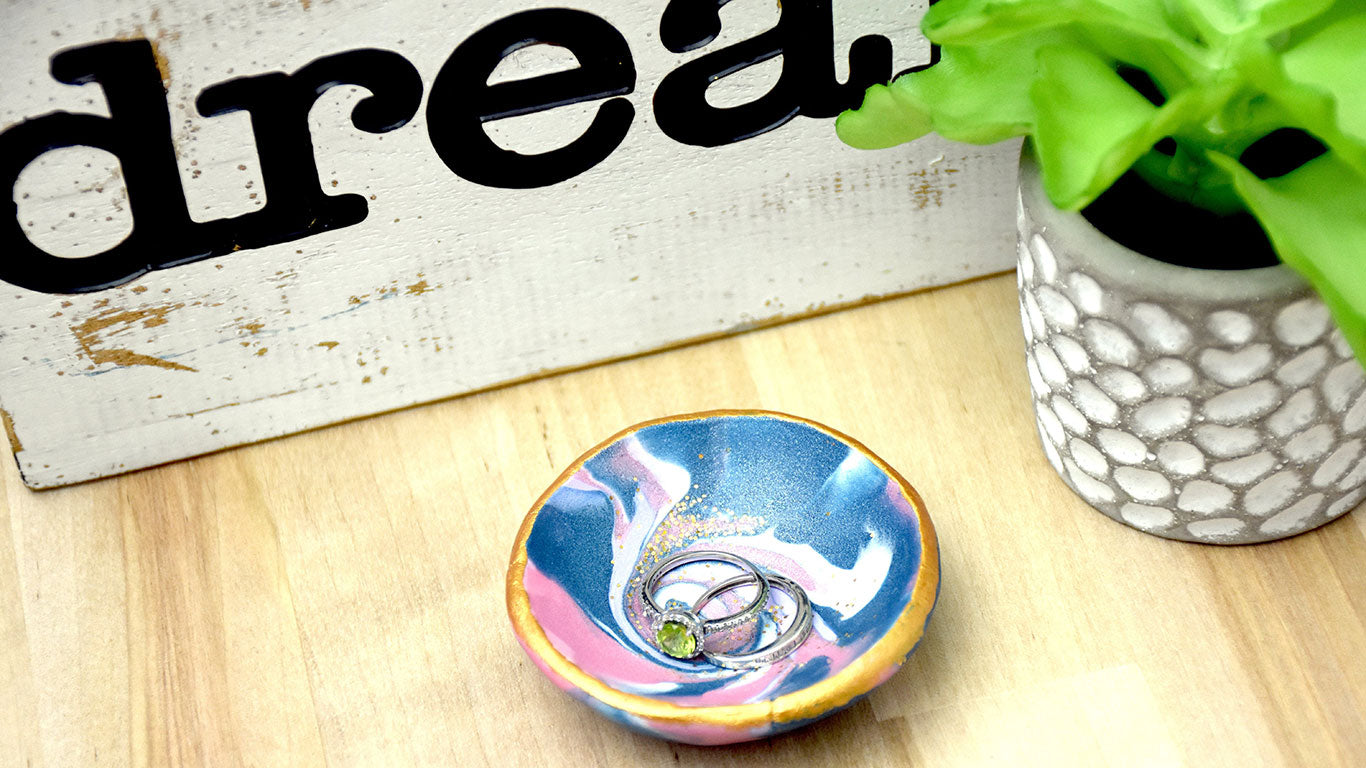
Use the Lentil Bead Technique to create a little ring dish with a glimpse of the galaxy inside! I love making these type of little dishes from my random scrap clays and I incorporate either glitter or composite leaf in the scraps. Miraculously, the glitter and the leaf bits will follow the swirl pattern making the finished piece even more galactic!
ADDITIONAL SUPPLIES
- Heavy glass plate with a completely smooth bottom
- 3”-4” Diameter hemisphere baking bowl for a dish form
- Gold glitter – Optional
- Gold acrylic paint
- Paintbrush
Project Instructions
- Getting Started:
Start with clean hands, unwrap and knead clay until soft and smooth, or condition by running clay though a Pasta Machine. We recommend using a designated machine for clay purposes only. When working with multiple colors, clean hands with soap and water or baby wipes (we have found that baby wipes work best) before switching colors. Shape clay, pressing pieces firmly together. Wash hands after use.
- Baking:
Condition and shape 1/8 bar of each color into a thick log. This amount of clay will make a little dish that is approximately 2.5”-3” in diameter. You can use more clay if you want a larger dish. Stack the thick logs together as shown.

Knead the four colors together and then form a large ball.

If you want to add glitter, do so at this step. Just sprinkle some glitter on your work surface and roll the ball around in it until it is picked up by the clay.

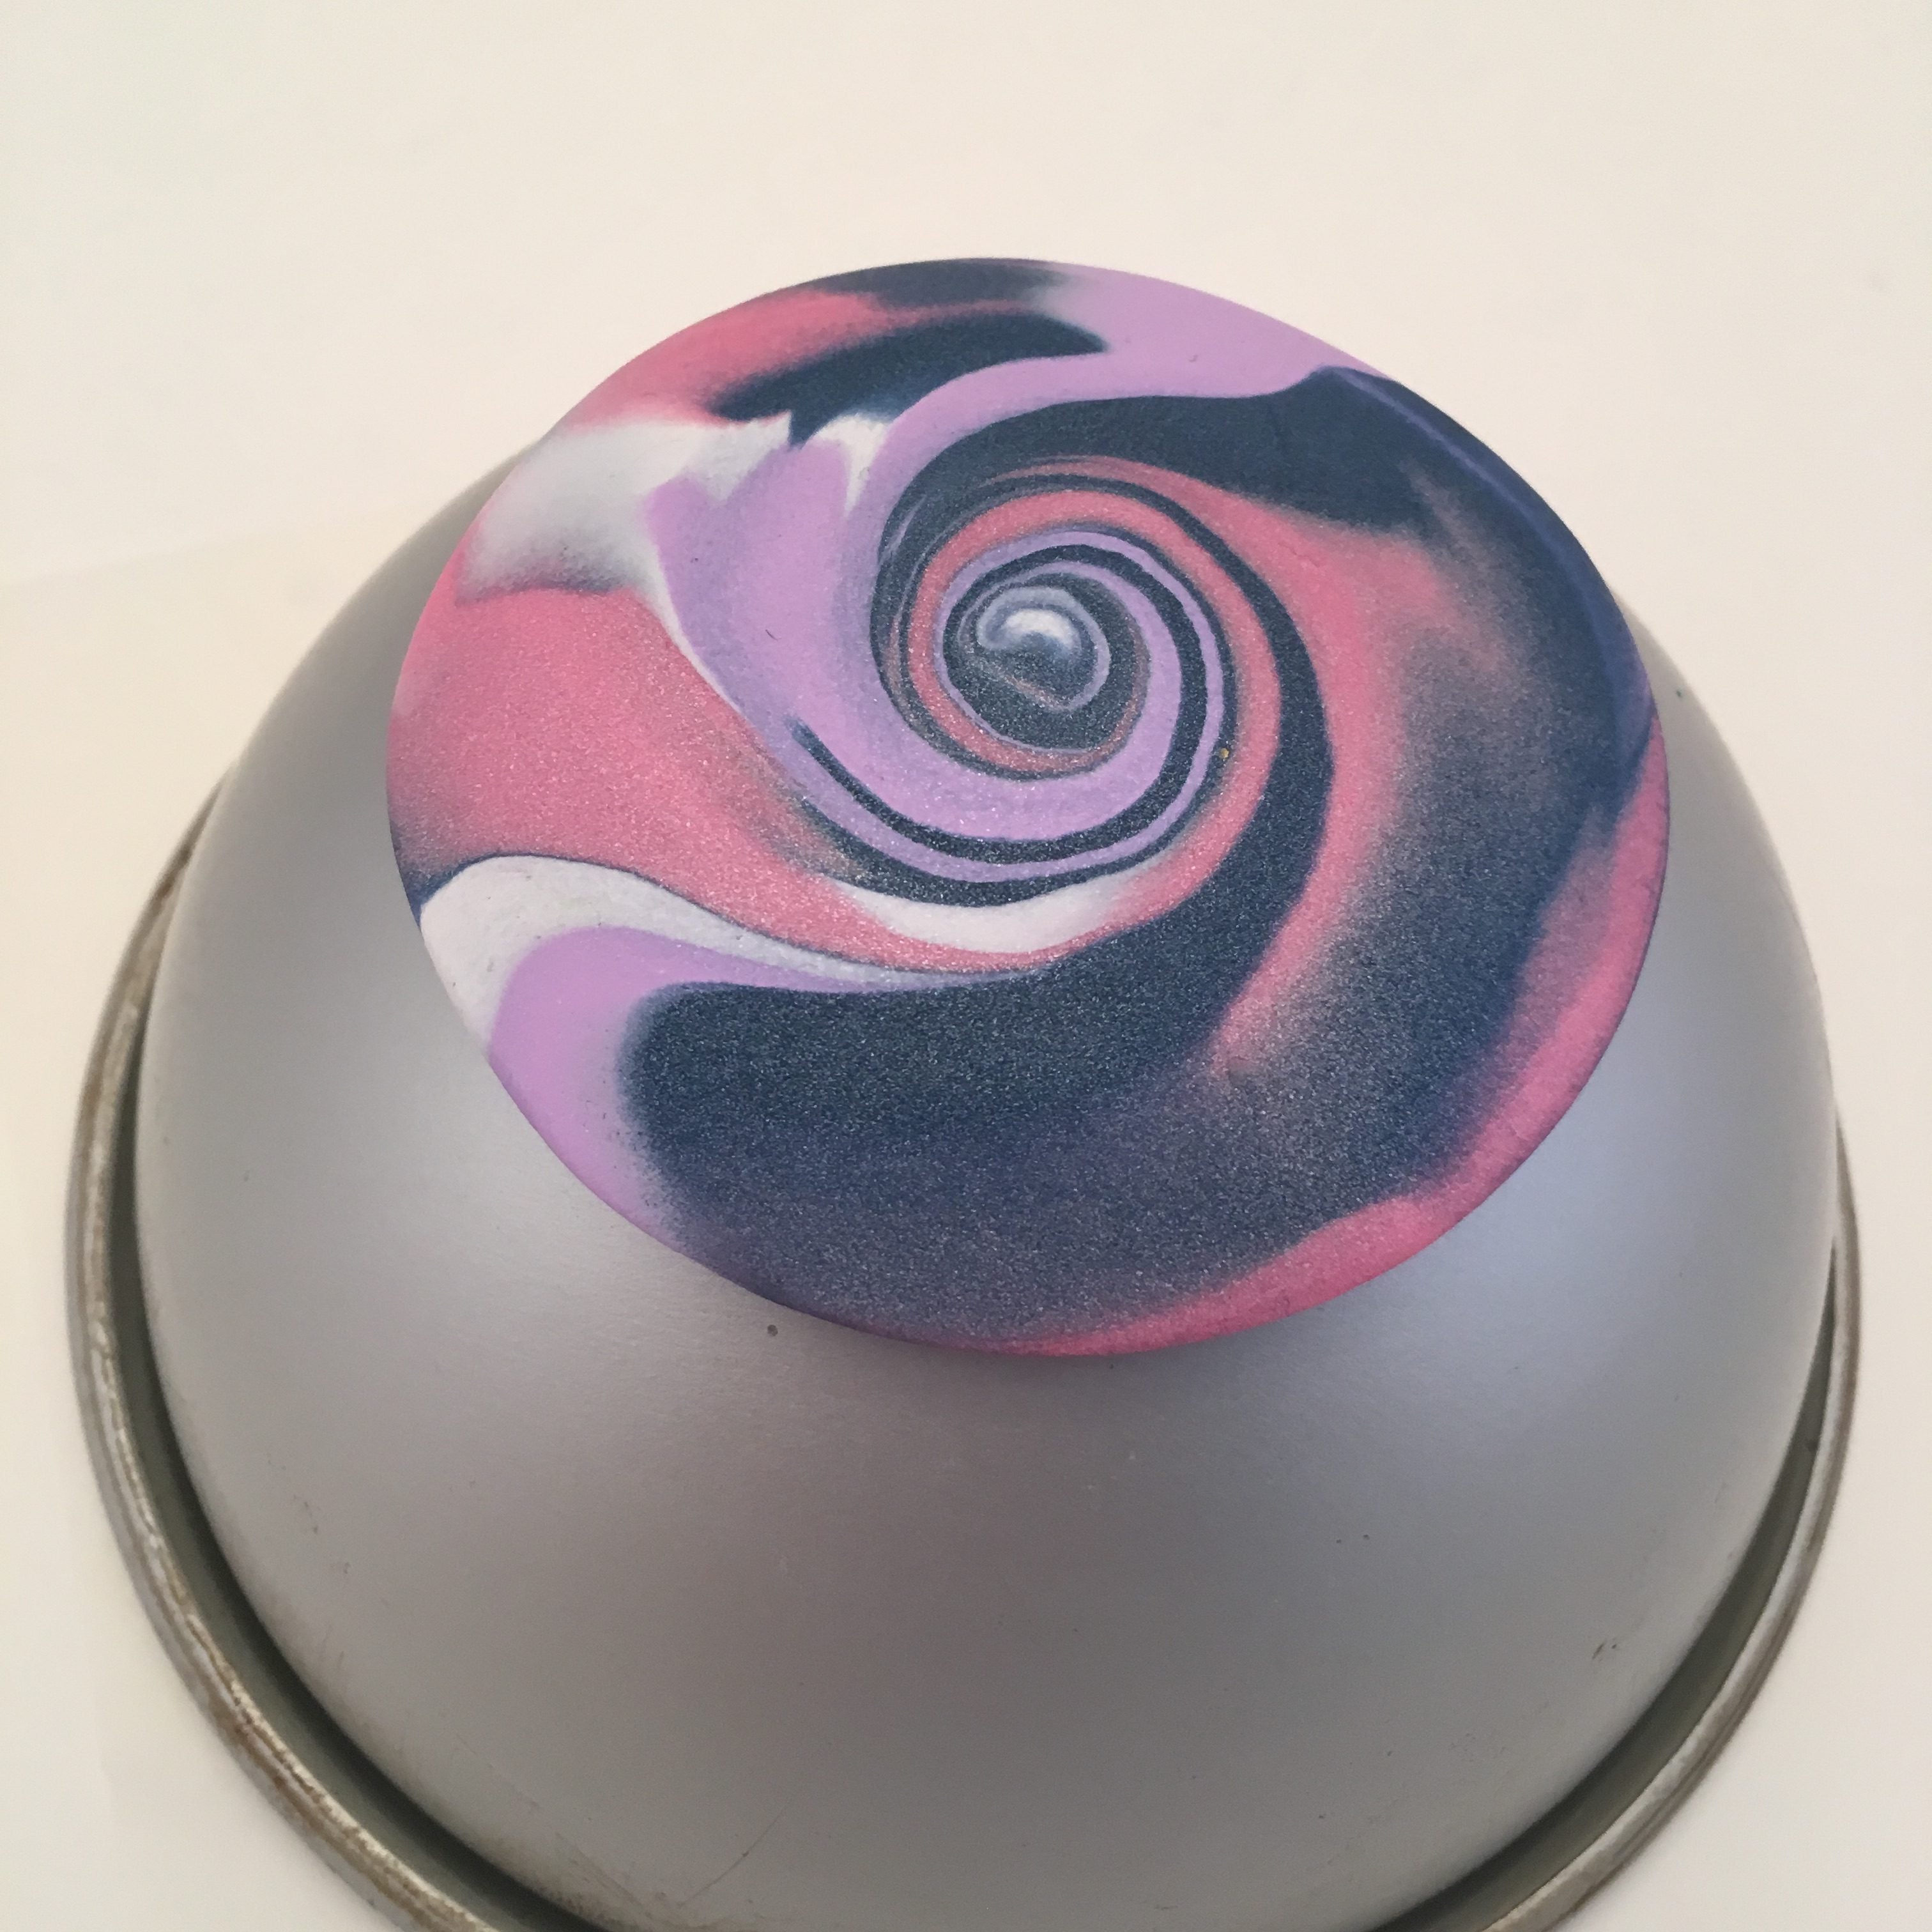
Keep swirling the bi-cone in large circles to make the clay colors swirl around each other. When you are happy with the swirling, reduce the size of the circle you are swirling with the plate and the bi-cone will turn into a lentil shape - a perfectly formed circle with slightly beveled sides.

Place the plate over the ball. Grasp the plate at the sides and level the plate on top of the ball. The ball will be trapped between your work surface and the plate. Begin swirling the plate around in circles applying enough pressure that after a few turns, you will notice the ball is becoming a bi-cone shape. I have found that this swirling motion actually takes quite a bit of practice. Don't be discouraged if it doesn’t work out on the first try. Just scramble the clay up and try again!

If the lentil shape is really thick, thin it by applying pressure with the glass plate. This will spread the clay out a bit but still keeps it in a nice even circle.

Carefully peel the clay away from the glass plate. Decide which side of the swirled clay you like best. I like to make my favorite side be the inside of the dish because you will see the inside of a shallow dish more often than the outside. Press your favorite side to the hemisphere baking bowl. Press it down from the center going outward pushing air bubbles out from between the clay and the bowl.
Push the edges of the clay tightly to the sides of the bowl to create a thin lip all the way around. You can make this lip as thin or as thick as you like. If you intend to paint it later, making a little thicker lip will help the painted edge to show better.

Use the plate to push a flat bottom to the bowl.

Bake the dish on the bowl form following the baking instructions for Sculpey®III. When the dish and the form are completely cool, carefully pop the clay off of the form. Clean the form with water and dry with paper towels for the next use. Here’s a look at a bowl I made that incorporates gold glitter into the color scheme.

This dish sample does not have glitter added. Paint the lip edge of the bowl with gold acrylic paint and allow to dry completely before use.
