
Original Sculpey® Granite Miniature Fairy House
Original Sculpey® Granite Miniature Fairy House
Designed by Phoebe Doehring
Read More
Read Less
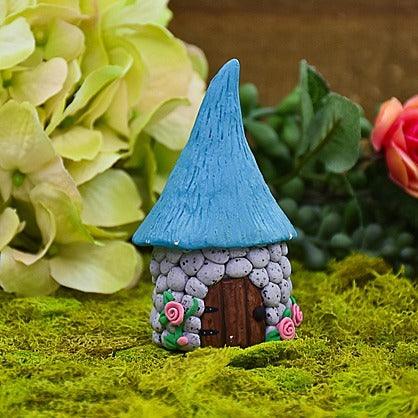
Original Sculpey® Granite is the perfect medium to create this miniature fairy house to tuck into your Summer flower pots in your garden!
TIME TO COMPLETION: about 60 minutes with baking
ADDITIONAL SUPPLIES
- Americana Acrylic Paints: Desert Turquoise, Burnt Umber, Black
- Paintbrush
Project Instructions
- Getting Started:
Start with clean hands, unwrap and knead clay until soft and smooth, or condition by running clay though a Pasta Machine. We recommend using a designated machine for clay purposes only. When working with multiple colors, clean hands with soap and water or baby wipes (we have found that baby wipes work best) before switching colors. Shape clay, pressing pieces firmly together. Wash hands after use.
- Baking:
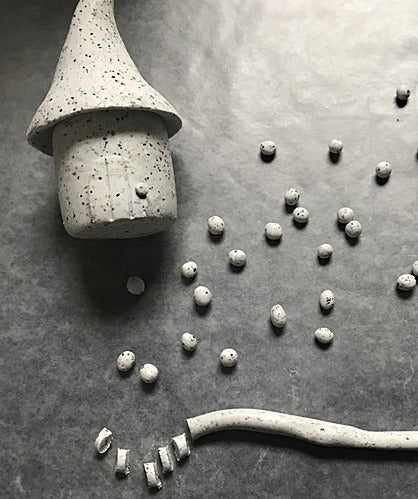
Roll a 2” ball of Granite clay. Roll the ball into a cylinder shape that is approximately 1 1/2” in diameter and 2” tall. Roll a 1 1/2” ball of Granite clay. Roll and shape into a cone shape for the roof. Pinch at the bottom edges so that they fan out a bit. Press the roof firmly onto the cylinder base. Bend the top of the roof slightly.

Roll out a small sheet of Granite clay with your acrylic roller that is approx. 1/8” thick. Use your clay knife and cut out a small curved door shape for the fairy house. Smooth edges. Use your 5 in 1 tool and make two vertical lines down the door to look like wood panels. Press the door onto the house. Roll a tiny ball of Granite for the doorknob. Press onto the righthand side of the door.


Roll a long snake of Granite clay that is roughly 1/4” thick and 10” or so long. Cut lots of little pieces off of this snake and roll into balls. It doesn’t matter if they are all the same size, it is almost better if they vary a bit and they also don’t have to be perfectly round. Start pressing the little balls on the house so that it looks like stones. Cover the entire house.

Use your 5 in 1 tool (pointed attachment) to create texture on the roof by making random vertical lines all over the roof. This makes the roof look almost like a thatched roof.

Time to use your Sculpey Bake Shop clays and add some roses on vines and leaves. Make little vines by rolling very thin snakes of Green clay. Cut them to the size you want and then point one end. Attach the vines to the house on either size of the door curving them slightly and maybe another vine in the back.
Next add some little leaves. Roll tiny balls of Green clay. Shape them into leaf shapes and press flat. Use your 5 in 1 tool to make a line down the center of each leaf. Press them onto the vines wherever you see fit.
Time to add roses and buds. To make the roses roll a small snake of Pink clay approximately1/8” thick and 1 1/2” long. Press the snake flat with your fingertip. Roll the flattened piece in a spiral until you have a tiny rose. Simply pull the end to trim. Squeeze the bottom of the rose with your fingertips, this helps to fan it out a bit. Trim off excess with your clay knife to you have a nice flat base. Make as many roses as you see fit and attach them to the vine. To add little rosebuds simply roll tiny balls of Pink and attach them to the ends of the vines and in random places.

Bake the fairy house according to package directions. Allow to cool completely.
Paint the front door Burnt Umber. Paint hinges and the doorknob Black. Paint the roof Desert Turquoise. Allow to dry completely.
Paint the front door Burnt Umber. Paint hinges and the doorknob Black. Paint the roof Desert Turquoise. Allow to dry completely.
- Choosing a selection results in a full page refresh.
- Opens in a new window.