
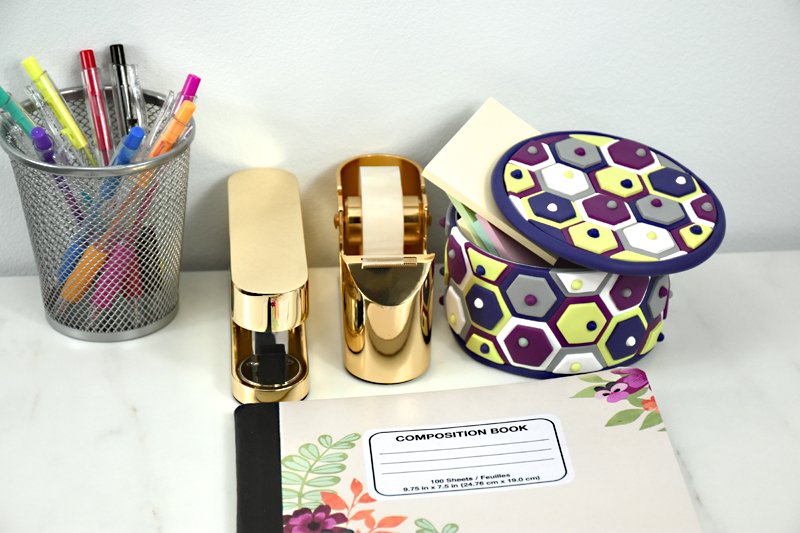
Sculpey Souflle™ Hexagon Tiled Trinket Box
Sculpey Souflle™ Hexagon Tiled Trinket Box
Designed by Amy Koranek
Read More
Read Less
Sculpey Souffle™ clays and the Sculpey® Hexagon cutters team up to help upcycle a clean food can from your kitchen.
ADDITIONAL SUPPLIES
- Exacto type craft knife
- Tuna or chicken can that has been thoroughly emptied, washed, and dried
- White craft glue
- Scrap copier paper or parchment paper for keeping all the little clay cutouts organized
Project Instructions
- Getting Started:
Start with clean hands, unwrap and knead clay until soft and smooth, or condition by running clay though a Pasta Machine. We recommend using a designated machine for clay purposes only. When working with multiple colors, clean hands with soap and water or baby wipes (we have found that baby wipes work best) before switching colors. Shape clay, pressing pieces firmly together. Wash hands after use.
- Baking:
Sheet Royalty through the pasta machine on the thickest setting. Lay the clean can upside down on top of the clay. For the outside of the lid, cut out around the outside of the can with a craft knife. Smooth the cut edges with your fingertips. Set the lid piece aside for now. For the inside of the lid, press the lip of the can into the clay to make a mark. Trim inside this mark so that you have a disk that will easily fit into the can. Smooth the cut edges with your fingertips. Set this piece aside for now as well.

Cover the outside of the can with a layer of white craft glue. Spread the glue thinly with your fingertips so that it has an even thickness. Allow the glue to dry completely. The glue makes a nice surface that the clay will stick to.

Sheet each of the colors through the pasta machine to the second thickest setting. Cut out as many large hexagon shapes as you can from each color using the large hexagon cutter. If you lay them on a piece of copier paper or parchment paper as you remove them from the cutter, you can easily move them around once the pieces are all cut.

Place the hexagons onto the side of the can making sure all the sides are touching. I developed a pattern of colors that I repeated all the way around to speed the process along.

When you get all the way around, if the remaining space is smaller than the hexagons, you can simply trim the hexagons on one or two sides so they will fit in the gap.

Take all the scraps of the colors and sheet them through the pasta machine to the second thickest setting. Cut out as many small hexagons using the small hexagon cutter as you can from each color. Lay the cut pieces on a piece of copier paper or baking parchment as you cut them.

Layer the small hexagons over the centers of the large hexagons on the can

I thought the hexagon pattern would look cool if it was interrupted by the softness of a small circle. Randomly press a divot into each of the small hexagons with the 6mm ball tool.

Fill each of the divots with a different color of clay using the largest Etch ‘n Pearl.

To finish the bottom of the can, roll a 1/4” rope of Royalty and place it around the bottom edge. Trim the ends and smooth the seam with your fingertips.

Bake the can following the baking instructions. While the can is baking, we can assemble the lid. Take the Royalty circle piece for the outside of the lid that was cut out in Step 2. Starting in the middle, lay down a pattern of large hexagons.

Cover the entire lid with large hexagons.

Even fill in all the little spaces around the edges with hexagons. Trim the hexagons following the edge of the circle lid.

Place a small hexagon in the center of each large hexagon.

Make random divots in the small hexagons with the 6mm ball tool. Fill each divot with a pearl using the large Etch ‘n Pearl.

Roll a 1/4” rope of Royalty. Wrap the rope all the way around the lid. Trim the ends and smooth the seam with your fingertips. Bake the lid following the baking instructions.

When the lid is completely cool, take the inside lid piece that was cut in Step 1 and place a layer of Translucent Liquid Sculpey (TLS) all over it. Smooth the layer with your fingertips so that it is even. Place the inside of the lid in the middle of the back of the outside lid sandwiching the TLS in between the layers. Bake the lid one more time following the baking instructions. When the lid is completely cool, place it on top of the box and fill with trinkets.


- Choosing a selection results in a full page refresh.
- Opens in a new window.