


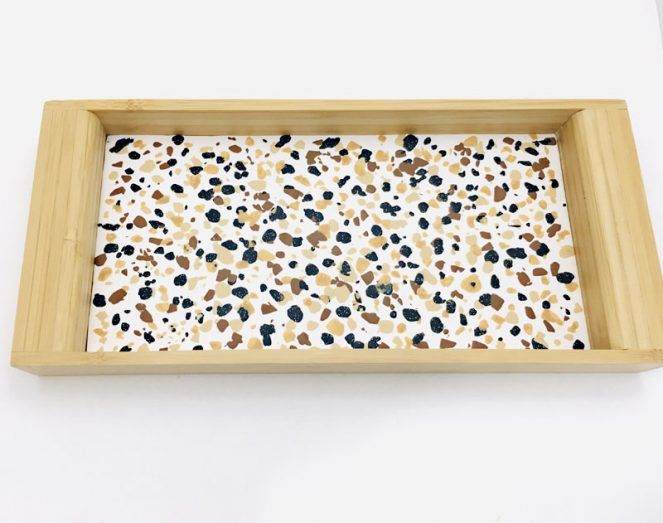
Premo Sculpey™ Faux-Terrazzo Tray
Premo Sculpey™ Faux-Terrazzo Tray
Designed by Amy Koranek
Read More
Read Less
The terrazzo look is on trend and very easy to do! You can alter the clay colors used to suit your decor.
TIME TO COMPLETE:90 Minutes to make and bake
ADDITIONAL SUPPLIES
• Small unfinished wood tray
• Ruler
• Scissors
• Deli paper or copier paper or other barrier paper

Project Instructions
- Getting Started:
Start with clean hands, unwrap and knead clay until soft and smooth, or condition by running clay though a Pasta Machine. We recommend using a designated machine for clay purposes only. When working with multiple colors, clean hands with soap and water or baby wipes (we have found that baby wipes work best) before switching colors. Shape clay, pressing pieces firmly together. Wash hands after use.
- Baking:
Measure the inside of the tray and make a paper template that fits. Set the paper template aside for later use.

Squirt some Oven Bake Clay Adhesive into the bottom of the tray.

Spread the Oven Bake Clay Adhesive all over the inside bottom of the tray (where the clay will be placed) in a thin layer with the knife tool. Add more Oven Bake Clay Adhesive as necessary to make sure there is a thin layer inside the tray.

Use the Acrylic Clay Roller or a pasta machine to create a thin sheet from the two blocks of White Premo that is 1/8” thick. Make sure the shape of the sheet is compatible with the inside of the tray. Use the template to cut out the base shape of the tray from the White Premo sheet. Place the White Premo on top of a piece of paper so that it does not stick to the work surface and is easily managed.

On another small piece of paper, chop up 1/16 block of Twinkle Twinkle into tiny bits.

On another small piece of paper, chop up 1/16 block of Raw Sienna into tiny bits. Sprinkle the tiny bits of Raw Sienna all over the White Premo sheet.

On another small piece of paper, chop up 1/16 block of Ecru into tiny bits. Sprinkle the tiny bits of Ecru all over the White Premo sheet.
On another small piece of paper, chop up 1/16 block of 18K Gold into tiny bits. Sprinkle the tiny bits of 18K Gold all over the White Premo sheet. Press the bits into the White sheet with hand pressure. Then roll over them with the Acrylic Clay Roller in each direction so that the bits embed into the White background.

Use the template to check the size and shape of the terrazzo sheet once again. The sheet may have stretched when it was rolled with the roller. Trim as needed. Carefully peel the sprinkled sheet from the paper it is laying on and carefully place it in the bottom of the tray. Work out air bubbles with your fingertips or with the Acrylic Clay Roller

Bake the clay inside the tray following the baking instructions for Premo. Allow to cool completely before handling.
