
Sculpey® Amazing Eraser Clay® 2 Cool for School Erasers
Sculpey® Amazing Eraser Clay® 2 Cool for School Erasers
Read More
Britta Lautenschlager
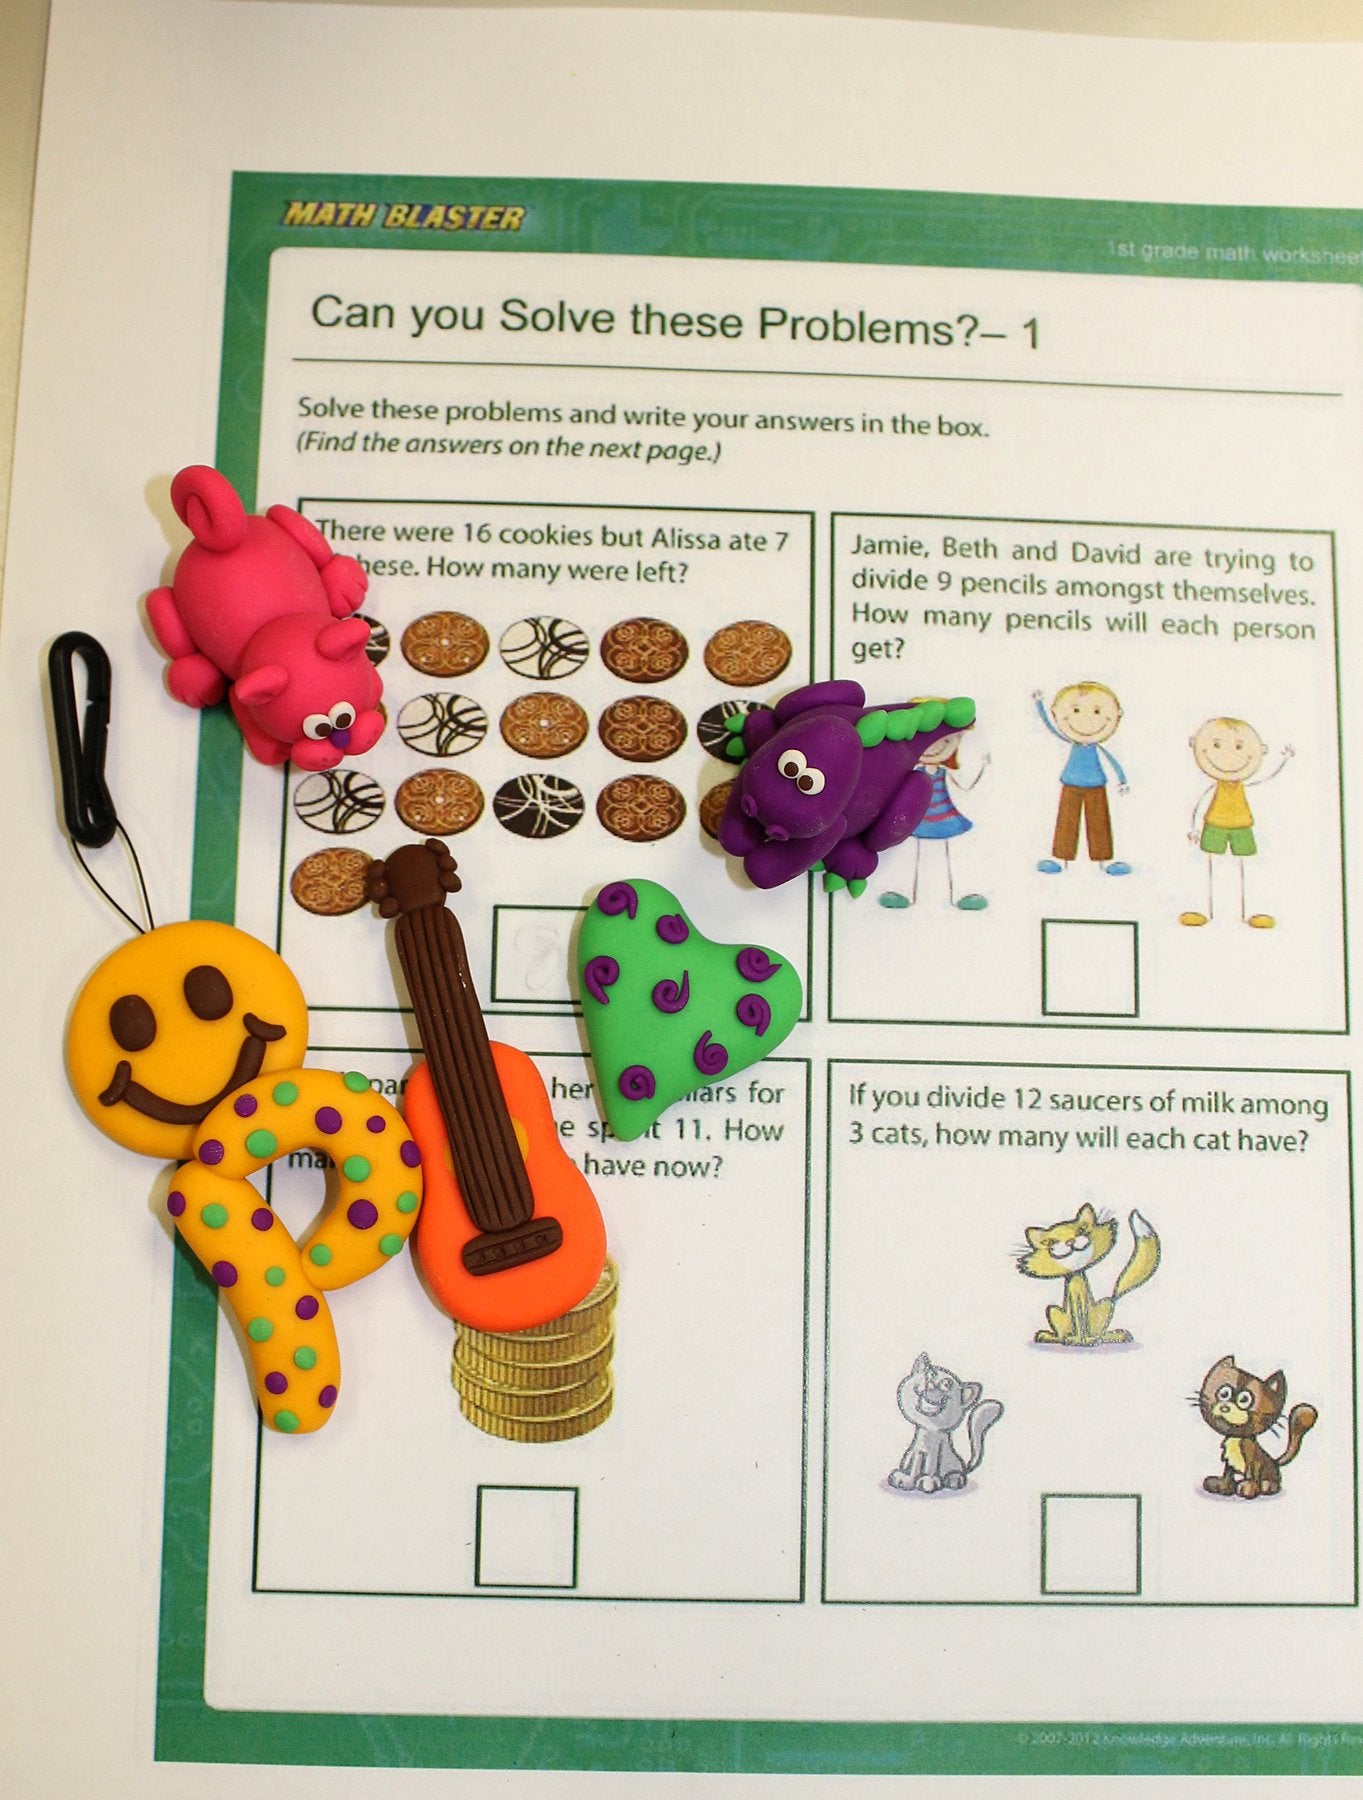
The new school year is here! What better way to be too cool for school than with these custom made erasers. Make one, a few, or all six—it’s all up to you!
Read Less
Britta Lautenschlager
The new school year is here! What better way to be too cool for school than with these custom made erasers. Make one, a few, or all six—it’s all up to you!
ADDITIONAL SUPPLIES
• Printout of template
• Small round magnets
• Glue to attach the magnets|• Printout of template
• Small round magnets
• Glue to attach the magnets
Project Instructions
Preheat oven to 275 °F. Test temperature with oven thermometer for perfectly cured clay. Condition all clay by kneading until it’s soft and smooth (Condition the white first, so that your hands are clean. Clean hands with baby wipes between colors) or running it through the Clay Conditioning Machine for several passes on the widest setting. Fold the clay in half after each pass and insert the fold side into the rollers first. All baking should be done by an adult.
Knead in and mix 1 Tablespoon of nutmeg into a large conditioned clay ball of ¾ package of Ecru and ¾ package White Premo! Sculpey.

Flatten the clay onto a ceramic tile to a 3/16” thick sheet (Clay Conditioning Machine Setting #1) that is about 6” x 8”. Cut the edges straight, forming a 5 1/4” x 7 1/4” rectangle. Gently impress the birdhouse shape on the clay (but do NOT cut all the way through it). Trace and imprint the pattern opening with a pencil and impress the shape through the paper, or use a cookie cutter.
Secure a larger branch stamp (Fall On Me stamp set) to an acrylic block and mist stamp with water. Stamp a branch overlapping top edge of frame where shown in the finished frame above. Stamp three smaller branches on the top right and two close to the middle right as shown. Mist and stamp leaves where shown (notice the varied directions of the leaves) and then stamp an owl, so that his feet line up over a smaller branch. (Dog and Pony Show stamp set). Cut out the birdhouse opening with cutter or a craft knife and remove excess clay.

Bake your clay frame and allow it to cool. Brush on a coat of Sculpy Gloss Glaze and allow the glaze to dry.

Brush a coat of brown acrylic paint all over the frame, allowing it to fill the stamped images.

Wipe away some of the excess paint on the frame surface (with an up and down motion-vertically), so that the nutmeg shows through. Finish with one more coat of Sculpey Gloss Glazeglaze to seal the paint. Glue the clay frame onto the acrylic frame using E6000 adhesive and prop it so it is level while drying. Add your favorite fall photo and enjoy!

Preheat oven to 275 °F. Test temperature with oven thermometer for perfectly cured clay. Condition all clay by kneading until it’s soft and smooth (Condition the white first, so that your hands are clean. Clean hands with baby wipes between colors) or running it through the Clay Conditioning Machine for several passes on the widest setting. Fold the clay in half after each pass and insert the fold side into the rollers first. All baking should be done by an adult.
Knead in and mix 1 Tablespoon of nutmeg into a large conditioned clay ball of ¾ package of Ecru and ¾ package White Premo! Sculpey.
Flatten the clay onto a ceramic tile to a 3/16” thick sheet (Clay Conditioning Machine Setting #1) that is about 6” x 8”. Cut the edges straight, forming a 5 1/4” x 7 1/4” rectangle. Gently impress the birdhouse shape on the clay (but do NOT cut all the way through it). Trace and imprint the pattern opening with a pencil and impress the shape through the paper, or use a cookie cutter.
Secure a larger branch stamp (Fall On Me stamp set) to an acrylic block and mist stamp with water. Stamp a branch overlapping top edge of frame where shown in the finished frame above. Stamp three smaller branches on the top right and two close to the middle right as shown. Mist and stamp leaves where shown (notice the varied directions of the leaves) and then stamp an owl, so that his feet line up over a smaller branch. (Dog and Pony Show stamp set). Cut out the birdhouse opening with cutter or a craft knife and remove excess clay.
Bake your clay frame and allow it to cool. Brush on a coat of Sculpy Gloss Glaze and allow the glaze to dry.
Brush a coat of brown acrylic paint all over the frame, allowing it to fill the stamped images.
Wipe away some of the excess paint on the frame surface (with an up and down motion-vertically), so that the nutmeg shows through. Finish with one more coat of Sculpey Gloss Glazeglaze to seal the paint. Glue the clay frame onto the acrylic frame using E6000 adhesive and prop it so it is level while drying. Add your favorite fall photo and enjoy!