
Bake Shop™ Faceted Bead Necklace
Bake Shop™ Faceted Bead Necklace
Read More
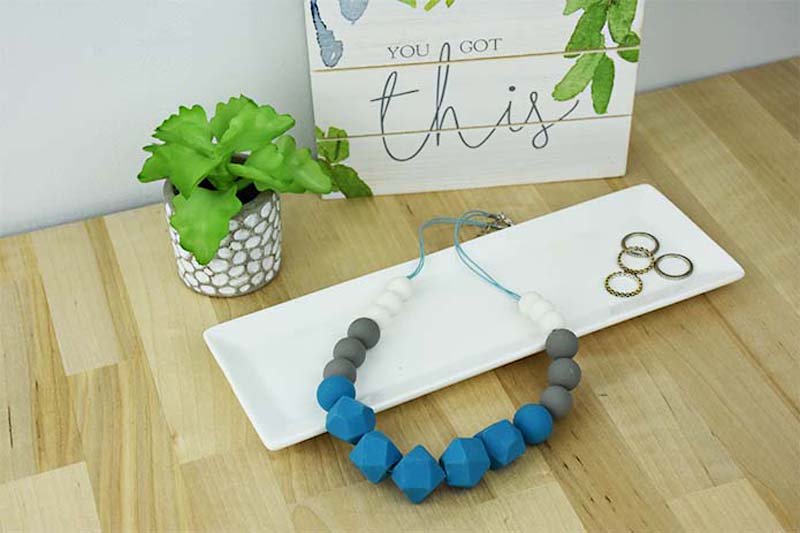
This statement piece necklace looks difficult, but it is super easy to create!
Read Less
ADDITIONAL SUPPLIES
- Round Leather Craft Lace .5mm (Turquoise)
- Crimp cord ends
- Pliers
- Wax paper
Project Instructions
- Getting Started:
Start with clean hands, unwrap and knead clay until soft and smooth, or condition by running clay though a Pasta Machine. We recommend using a designated machine for clay purposes only. When working with multiple colors, clean hands with soap and water or baby wipes (we have found that baby wipes work best) before switching colors. Shape clay, pressing pieces firmly together. Wash hands after use.
- Baking:
You will be making the following beads: 5 Turquoise faceted beads, 2 Turquoise 18mm round beads, 6 Gray 16mm round beads, and 6 White 13mm round beads. Start by rolling five 1 1/4” balls of Turquoise clay. Shape these balls into cubes with your fingers. Wrap in some wax paper and set in the freezer or fridge for 20 to 30 minutes. This will harden the clay a bit and make it easier to cut. Take cubes out of the freezer. Cut thin slices off all the sides of each cube to make the sides nice and flat. Make four diagonal cuts halfway down the cube. Turn the cube over and repeat this on the other side creating a faceted bead. Smooth and flatten the bead by gently pressing on your flat table on each flat faceted side of the bead. Finish by making a hole in the bead using one of the skewers from your bead baking rack. Repeat this process and make 5 faceted beads. These can either be baked on the rack or just on your baking tile or sheet since the sides are flat.

Make all round beads. To begin, press a small amount of Turquoise clay into the 18mm measuring cup that comes in the kit. Use your clay knife to cut off excess and make it a clean fit. Remove and roll into a ball. Repeat. Place the ball into the 18mm bead roller attachment and roll your bead. Remove the bead.

Carefully pierce your bead with the pointed end of the skewer. You can leave the bead on the skewer but just push it down to make room for a few more. Leave enough space between each bead. String 3 to 5 beads on a skewer and when ready, place the pointed end of the skewer into the notches on the top of the rack. Make sure all the holes in your beads will accommodate your cording. Repeat this process, making all of your round beads, except use the 16mm measuring cup and bead roller attachment for the Gray beads and the 13mm measuring cut and bead roller attachment for the White beads.

Bake according to the directions in Step 1. Allow to cool.
Cut the length of leather cord you desire for your necklace. 18” is a nice length. String beads onto your leather cord. String the 5 Turquoise faceted beads in the center followed by the 18mm Turquoise round beads on either side. Three 16mm Gray rounds on either side next and then lastly the 13mm White round beads on either side. Center all the beads on your cord and tie knots to keep in place if you desire. Finish your necklace using the crimp cord ends. Secure with your pliers.
