
Model Air Celebration Cake
Model Air Celebration Cake
Read More
Designed by Lucy Koranek with Amy Koranek
Lucy and I had fun making a little cake to use as a centerpiece for special events - birthdays, anniversaries, and celebrations. Model Air is an air dry clay that requires some conditioning and kneading to help all the pieces stick together. A little person can certainly benefit from the assistance of a big person to prepare the clay for creativity.
Read Less
ADDITIONAL SUPPLIES
craft knife, Mug of water. Paper towels. Acrylic paints in your choice of colors. Paint brushes. Zip plastic bag. Paper plate|craft knife, Mug of water. Paper towels. Acrylic paints in your choice of colors. Paint brushes. Zip plastic bag. Paper plate
Project Instructions
Getting Started:Polymer clay may stain. CLAY MAY DAMAGE UNPROTECTED FURNITURE OR FINISHED SURFACES. DO NOT USE polymer clay on unprotected surfaces. Read the package directions thoroughly. Shape clay, pressing pieces together firmly.
It’s helpful to have a zipper type plastic bag on hand to store the excess Model Air in so that it does not dry out. Model Air should be kneaded to make sure it’s all smooth before beginning. You can add water at any time to help make the Model Air softer and more pliable. Keep a cup of water nearby while you work.

Shape the Model Air into a thick square for the cake base. Start with a smooth ball and then push in on the sides to start getting the square shape.

Flatten the top to make sure it’s level and smooth for the next layer to sit on.

Take a smaller amount of Model Air and make a second layer smaller than the bottom layer.

Smear a thin layer of water on the top of the bottom layer.

Position the second layer at an angle to the first layer

Make a third smaller layer and position it on top of the other two also at an angle. Make sure to always hook pieces together by smearing water between the pieces where they touch.

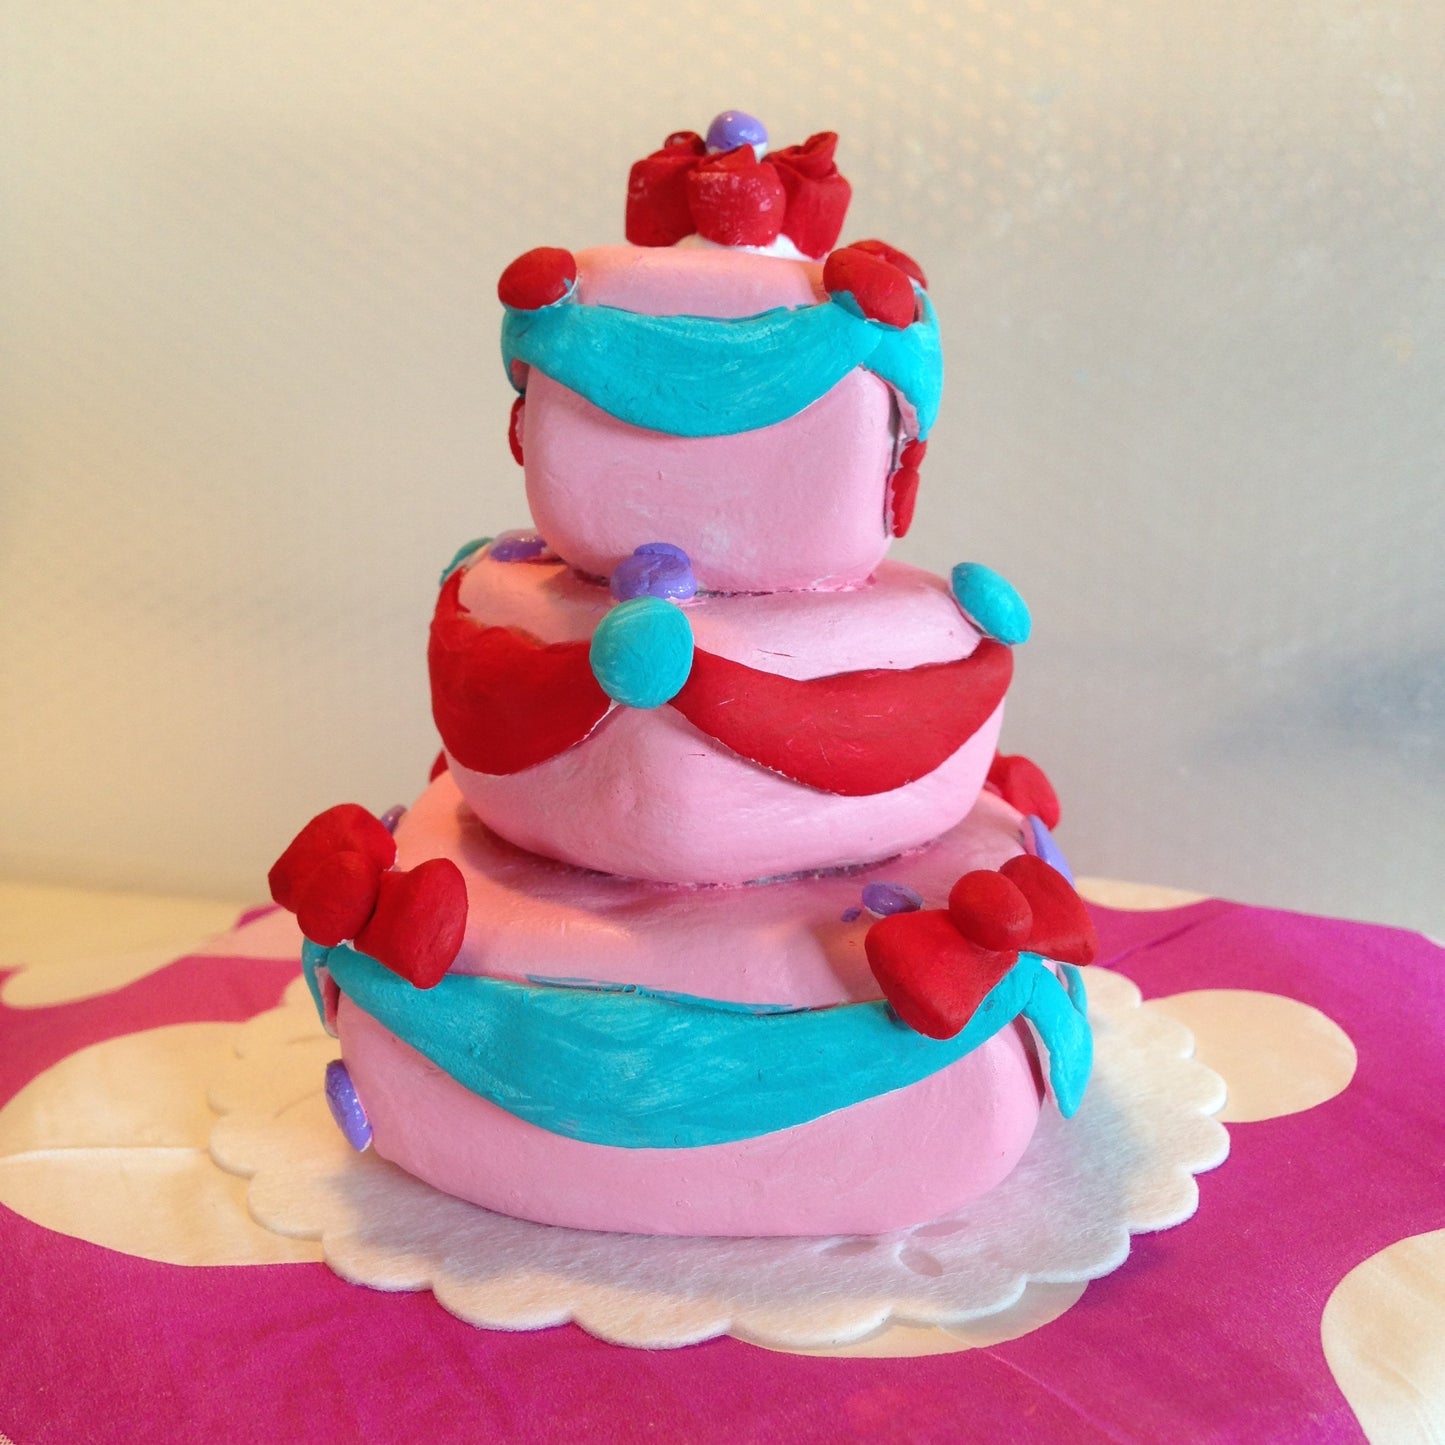
Make little shapes that are like long skinny flat bananas. These will be used as draping ribbons from corner to corner on each layer.

Always attach the ribbons with more water. Add little bow shapes on top of the ribbons at the corners.

Lucy finished decorating her cake with rolled up roses on the top and some specially placed polka dots.

When you are done creating, clean up your hands and work area with soap and water. Place all unused Model Air in the plastic bag and zip shut. Allow your cake to dry completely and then paint as you like with with acrylic paints. Lucy painted all the tiers with bubble gum pink paint first.

Then Lucy painted some ribbons red and some turquoise. Lucy painted the roses at the top red and she made some polka dots light purple, some red, and some turquoise. I helped her paint the areas that were little and hard to reach. Allow the paints to dry completely and enjoy!
