
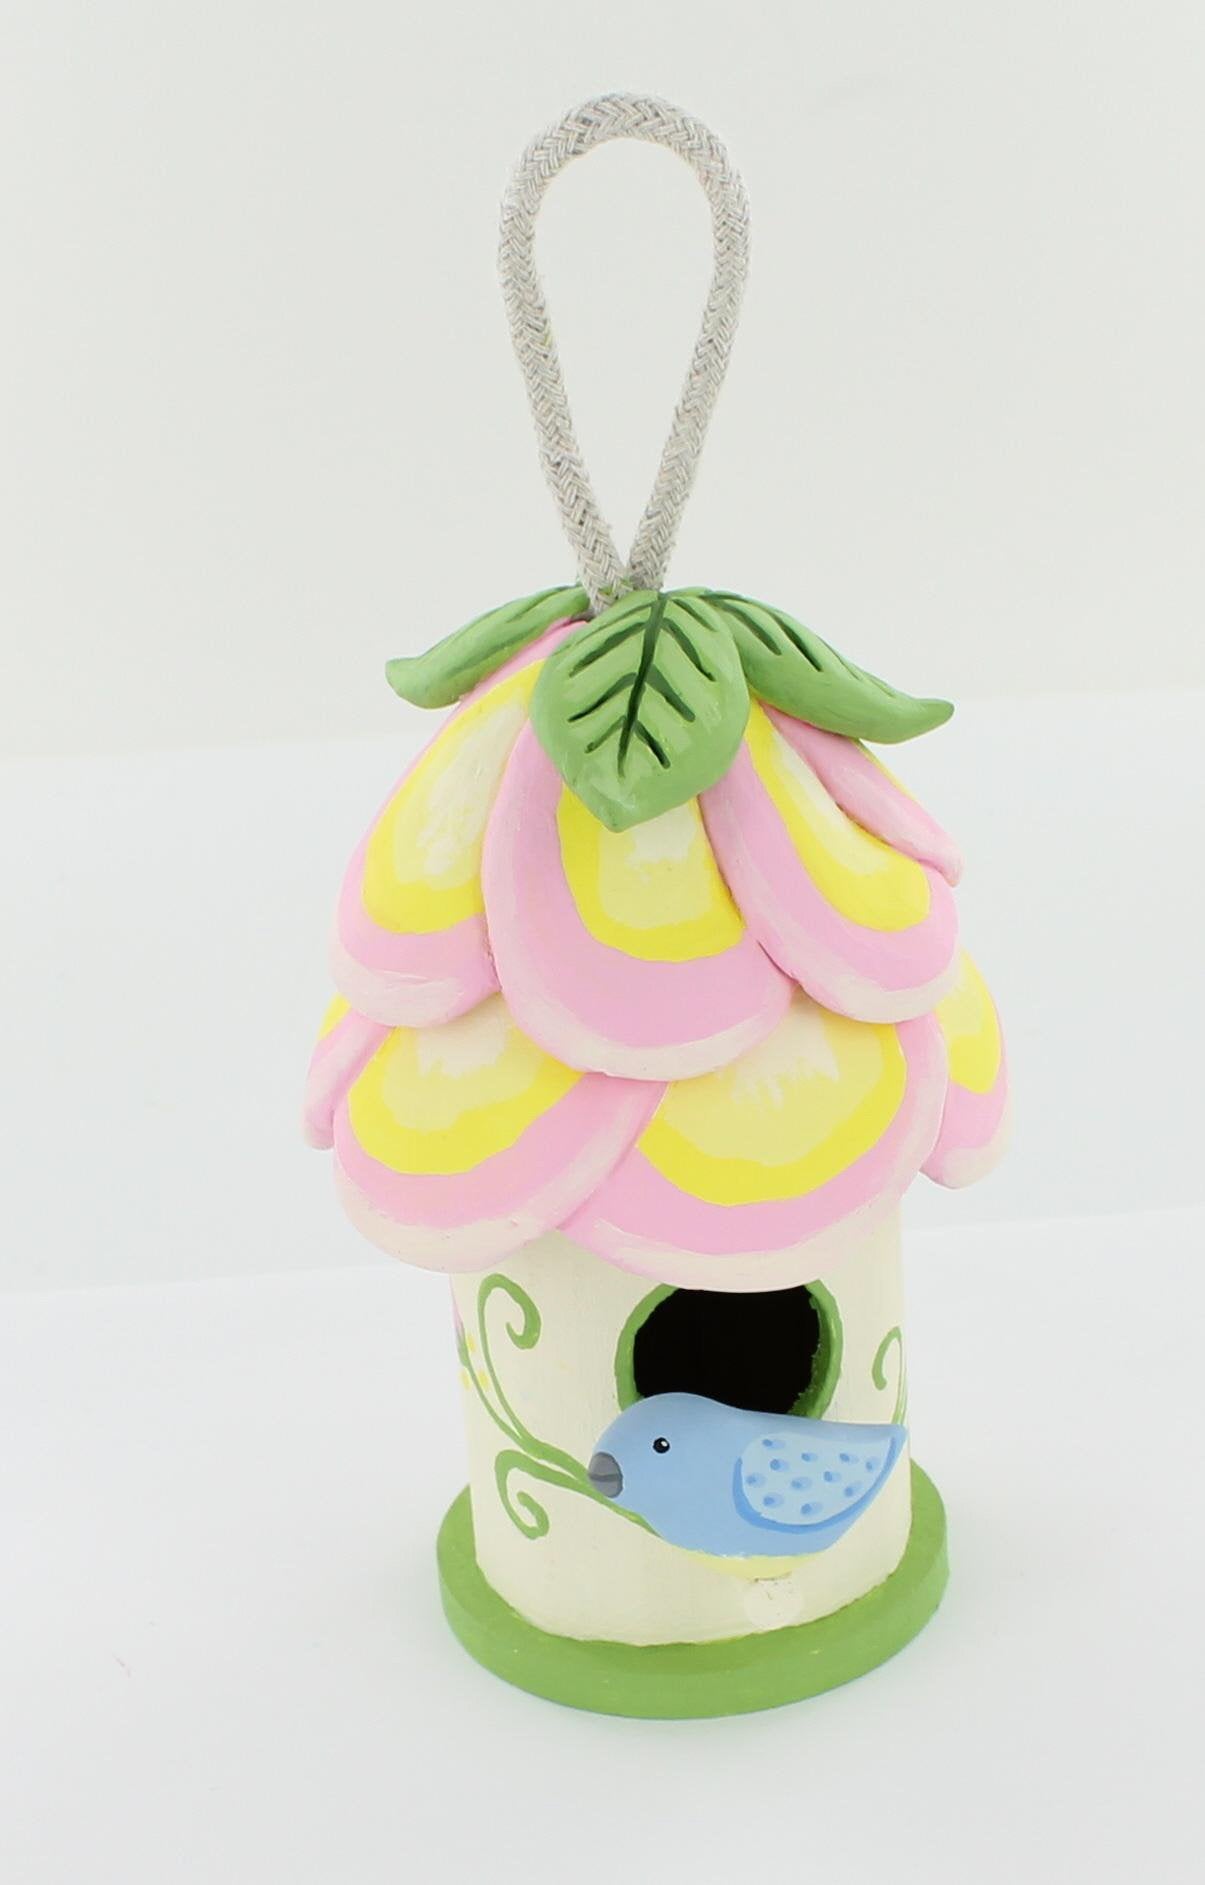
Model Air Bird House with Little Bird
Model Air Bird House with Little Bird
Read More
This super cute bird house is perfect for spring!! Tweet tweet!
GETTING STARTED:
Start with clean hands and work surface area. Good work surfaces include wax paper or disposable foil. Wash hands after use.
Note before you begin: As you are using this clay, have a small bowl of water handy so that you can dip your fingers in for smoothing cracks and softening.
Read Less
ADDITIONAL SUPPLIES
• Wooden Birdhouse
• Americana Acrylic Paints: Lemon yellow, Foliage Green, Baby Blue, Light Buttermilk, Poodleskirt Pink, Houser Green, Primary Blue, Black
• Bowl of Water
• Craft knife
• Hot Glue Gun
• Fine Sandpaper (optional)
• Paintbrush|• Wooden Birdhouse
• Americana Acrylic Paints: Lemon yellow, Foliage Green, Baby Blue, Light Buttermilk, Poodleskirt Pink, Houser Green, Primary Blue, Black
• Bowl of Water
• Craft knife
• Hot Glue Gun
• Fine Sandpaper (optional)
• Paintbrush
Project Instructions
First form your little bird. Roll a ball approximately 1” in size. Shape it into a football shape and then form the little head and tail. Place on the perch of the birdhouse and press lightly where you want it to be positioned. Set onto waxed paper to dry.

To make the larger flower petals - Roll 6 balls of clay 1 ½” in size. Press to flatten and form into petal shapes. Your petals will probably be about ¼” thick more or less. Trim the tops if you want. When you have made all six petals start pressing them onto the lower part of the roof of your birdhouse, overlapping each petal as you go. You want the petals to hang a bit over the edge. Make sure they are pressed on securely. Smooth if needed.

Now make your smaller flower petals. Roll 6 more balls of clay that are approximately 1” in size. Flatten and shape these into long petal shapes that are pointed at one end (like a teardrop). Once you have all 6 done, start pressing them onto the upper portion of the roof. The bottoms of these petals will overlap and cover the top of your larger petals. Overlap these and press them on with the pointed ends pointing to the top where the rope hanger is.

When all your petals are on the roof, smooth by dipping your finger in some water and smoothing until you have a nice finish.

Leafs for the very top of the birdhouse. Roll three ¾” balls. Flatten and shape these into leaf shapes. Using your craft knife make leaf veins in each leaf. Press these on top of the roof at the base of the rope hanger.

Allow this to dry now for 24 hours. Sand with fine sandpaper when dry if you want, this is optional.
Time to paint and decorate your birdhouse! * You may need to use 2 coats of paint for everything.Paint the bird Baby Blue and allow to dry completely. When dry, mix some Buttermilk and Baby Blue together and paint the wings a lighter shade of blue and allow to dry completely. When dry, add Baby Blue wing dots to the wings. Paint small round black eyes. Mix some Buttermilk and Black to make Grey and paint the beak. Make a lighter shade of grey and highlight the beak. Add tiny dots of buttermilk to each eye. Mix some Primary Blue and Buttermilk and make a line under each wing and make little dots inside the Baby Blue dots on each wing.
Paint the entire bottom portion of the birdhouse in Buttermilk.
Paint the leaves on top, the base of the birdhouse and the border of the hole all with Foliage Green.
Paint the lower portion of all the petals with Poodleskirt Pink. Paint the centers of the petals Lemon Yellow allow to dry completely. Then paint the centers of the yellow with Buttermilk. Highlight the tips of the petals with a little Buttermilk.
Paint the veins in the leaves with the darker Houser Green.
Make decorative spirals on either side of the hole and in the back with Foliage green. Add pink buds and yellow dots. Mix some Buttermilk and Pink and add some highlights to the flower buds.
When everything is dry attach your bird to the perch with a hot glue gun.
